
Build your own course
A school can make its own course by hand: its own modules and lessons, its own videos, presentations, lesson plans, quizzes and tests. No AI is needed.
Who can do it: a School Admin or Director (and the VocationalLMS Super Admin). Instructors can open the course and keep lesson plans. Other schools never see your course. Students see an item only after it is approved.
How-to video
1. Create the course
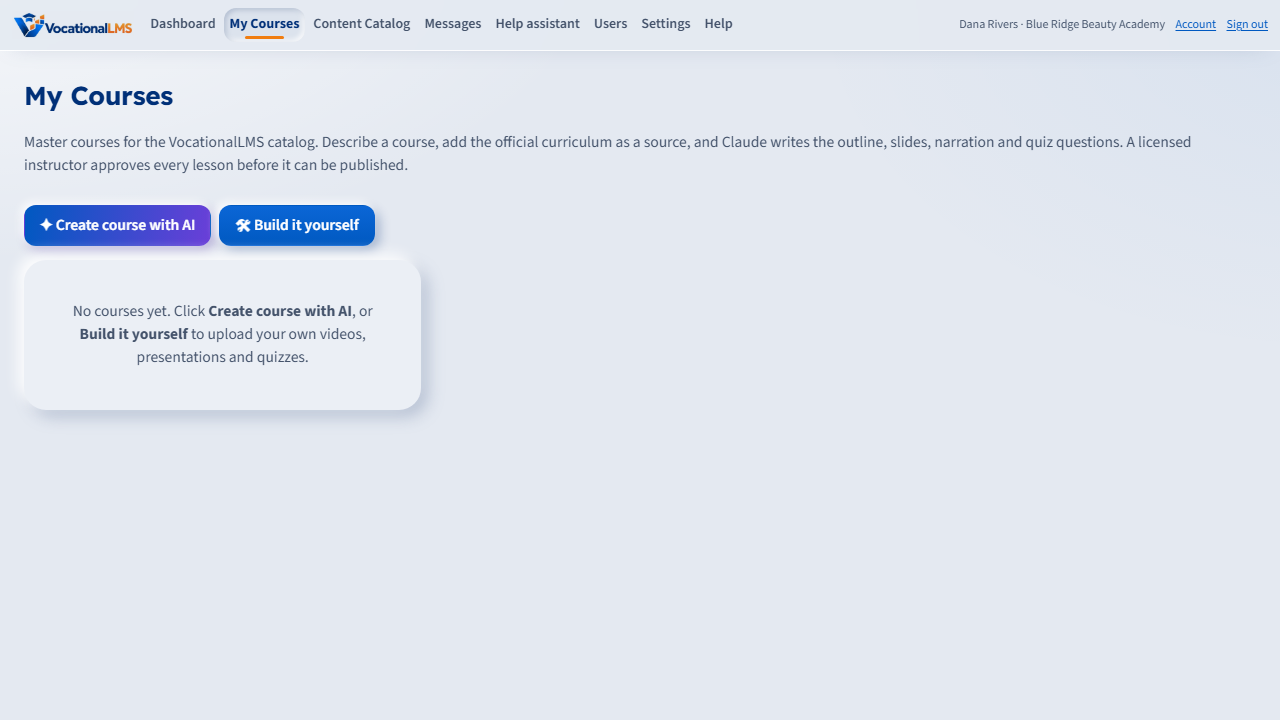
- Open My Courses and click 🛠 Build Course for and your school's name, for example Build Course for AVI Career Training (next to Create course with AI).
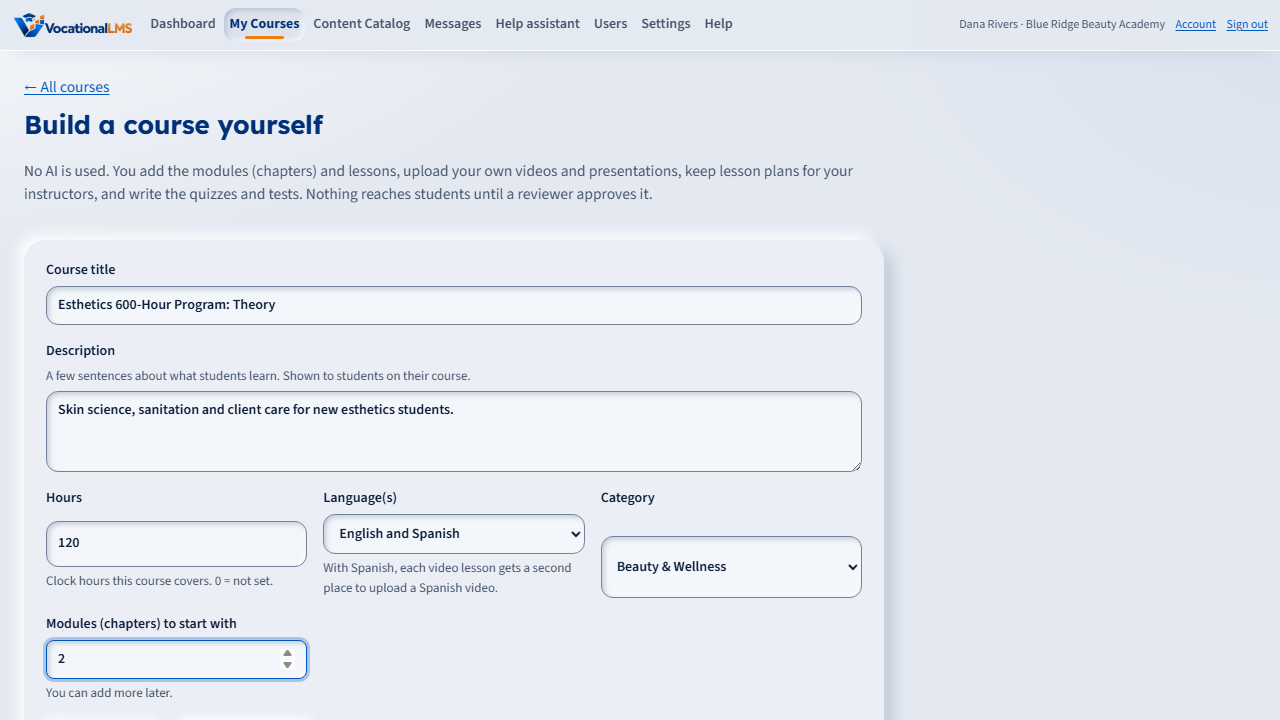
- Type the Course title and a short Description.
- Fill in the Hours the course covers, choose the Language(s) (English, or English and Spanish) and how many modules (chapters) to start with.
- Click Create course. The course page opens.
- The cover picture makes itself. As soon as the course exists, a realistic wide cover is drawn from its title and description (from the title and category when you left the description empty). The course page and the card in My Courses show Making cover… over the course's initials, then the picture, in about a minute. If you add the description later, the cover is designed once more from it the first time you save it; after that it only changes when you ask: open the Course cover panel on the course page, edit the picture description if you like, and click Regenerate cover. Your school can turn automatic covers off under Configuration › Course covers. There is no charge to your school.
2. Add modules and lessons
| # | To do this | Do this |
|---|---|---|
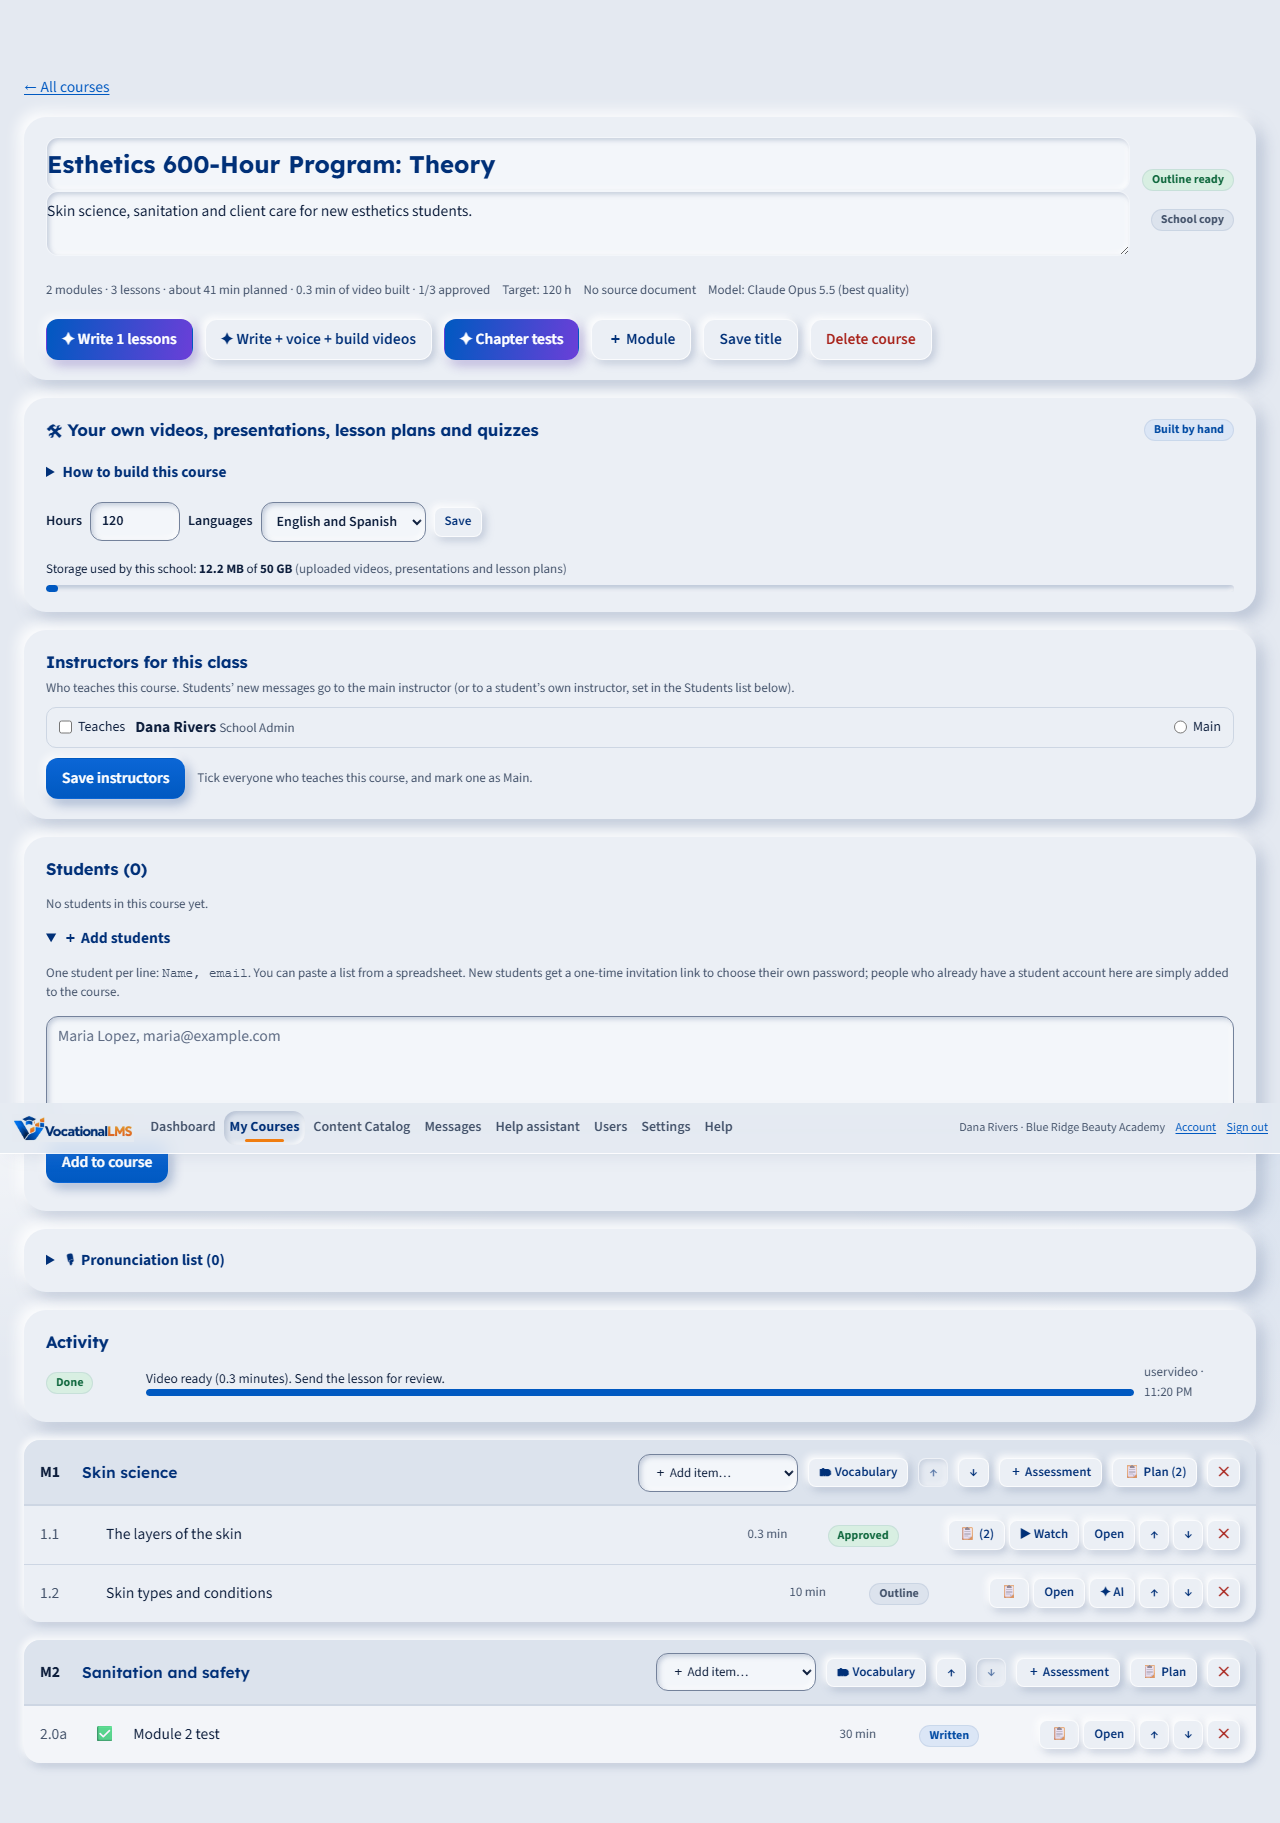
| 1 | Add a module | Click + Module near the top. The page scrolls to the new module, opens its lessons, and puts the cursor in its name so you can type the real name right away. It starts with one placeholder lesson, New lesson; rename it or add your own. Until a lesson is approved, Module access for students says Not approved yet with the number of lessons waiting. |
| 2 | Rename a module or lesson | Click its name, type the new name and press Tab or click somewhere else. It saves by itself. |
| 3 | Add a lesson or other item | In the module, open + Add item… and pick Video lesson, Reading, Document, Knowledge check, Discussion or Flashcards. |
| 4 | Move a module or a lesson | Use the ↑ and ↓ buttons on its row. |
| 5 | Delete | Click ✕. The button changes to Sure?; click it again to delete. |
| 6 | Work on a lesson | Click Open on its row. |
The box Your own videos, presentations, lesson plans and quizzes shows how much storage your school is using (50 GB to start with). There you can also change the course hours and languages.
3. Upload your lesson video
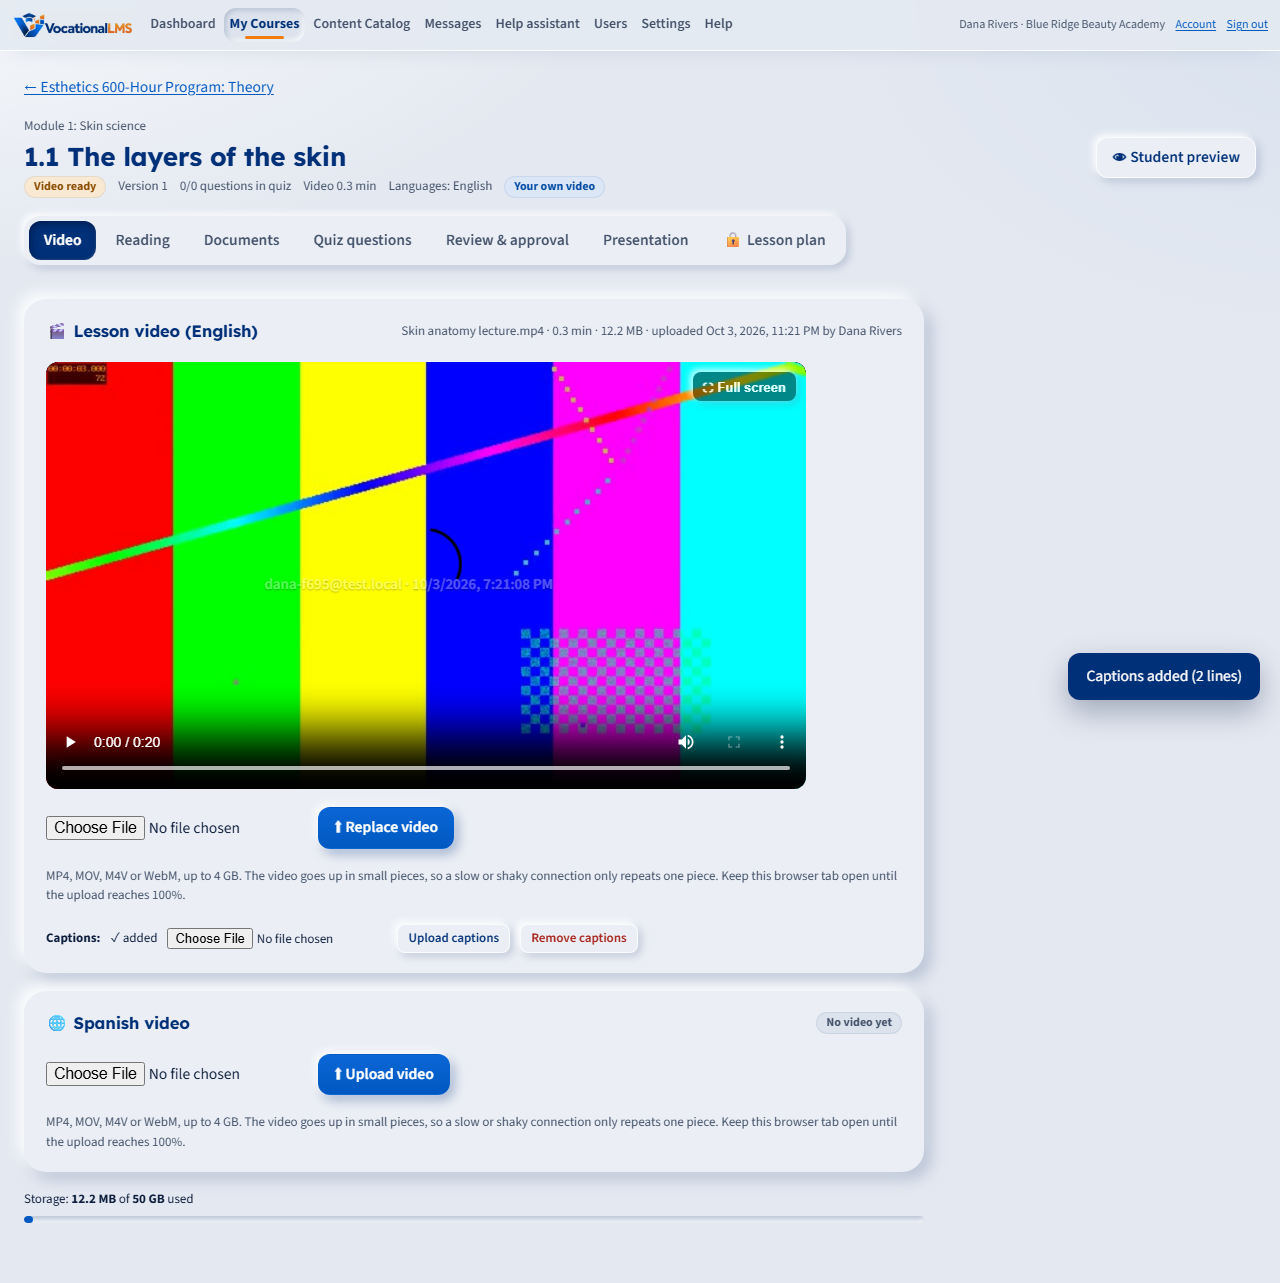
- Open the video lesson. You are on the Video tab.
- Click Choose File and pick your video: MP4, MOV, M4V or WebM, up to 4 GB.
- Click ⬆ Upload video. A bar shows how far it is. Keep the browser tab open until it reaches 100%.
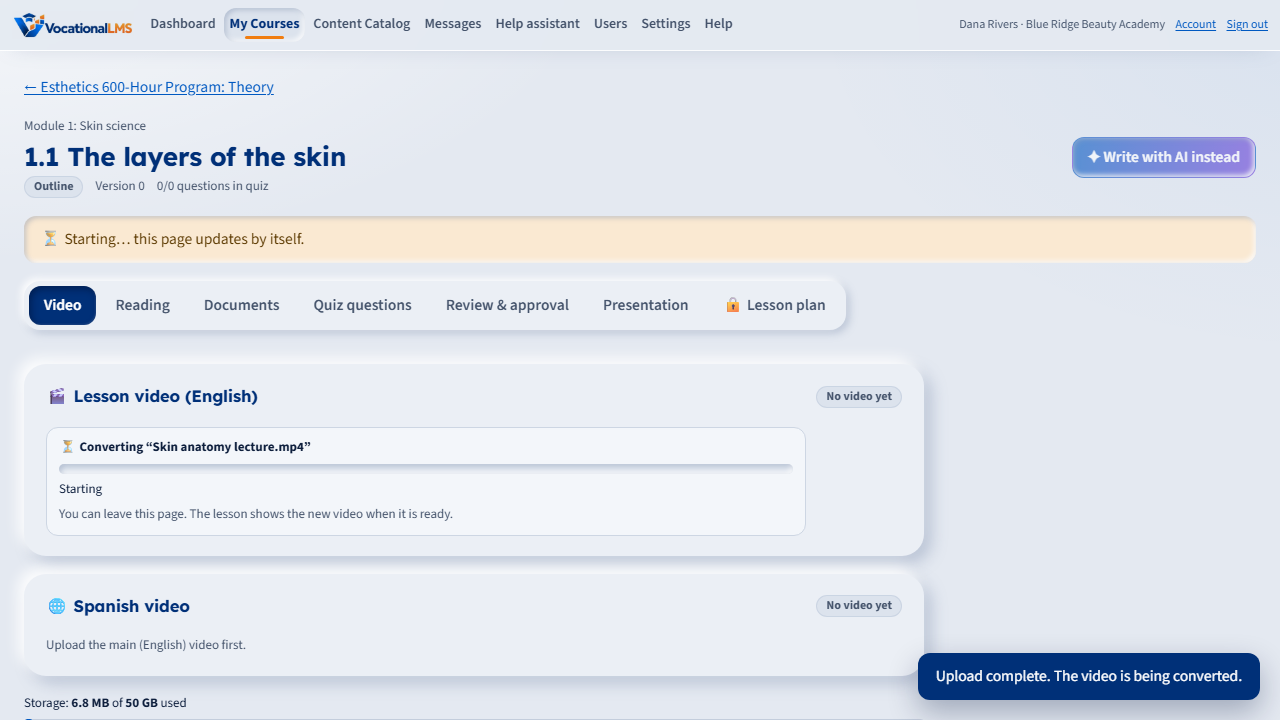
- The video is then converted (a few minutes; longer for a long video). You can leave the page. When it is done, the lesson shows the video, its length is filled in and the lesson says Video ready.
| # | Good to know | Details |
|---|---|---|
| 1 | Slow or shaky internet | The video goes up in small pieces. If the connection drops, only one piece is sent again. If the upload stops completely, choose the same file again and it continues where it stopped. |
| 2 | Protected playback | Students get the same protected stream as every other lesson: no download, with their name on the picture. The video is stored at up to 720p. |
| 3 | Watching rule | Students must watch at least 95% of the video (no skipping ahead) and pass the quiz to complete the lesson. Seat time is counted the same way as for every other lesson. |
| 4 | Captions | Under the video, choose a .vtt or .srt captions file and click Upload captions. |
| 5 | Spanish video | If the course languages are English and Spanish, a second box lets you upload a Spanish video. Students switch with the English / Español buttons. The quiz is the same. |
| 6 | Replace a video | Choose a new file and click ⬆ Replace video. The old video is kept under History: earlier videos, where you can Use this video again or delete it to free storage. The lesson goes back for review, so students can't see it until it is approved again. Captions belong to one video, so upload them again for the new one. |
| 7 | Safety check | The file must really be a video. A file that is something else with a video name is refused. |
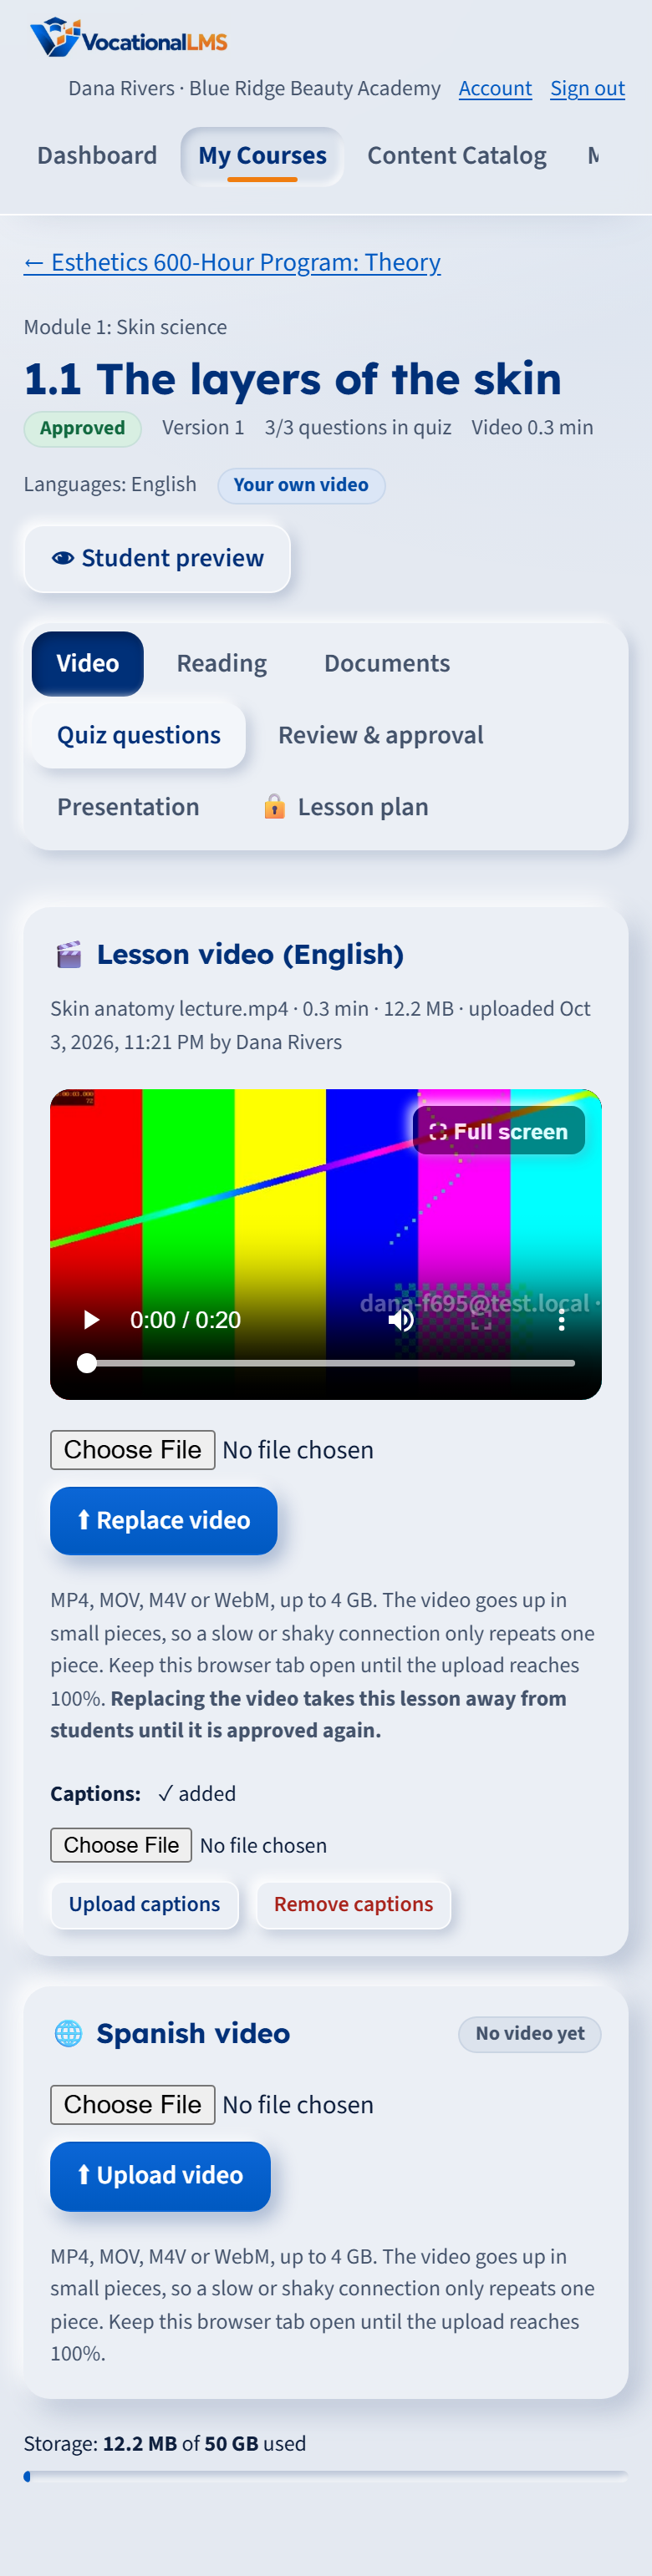
On a phone the same page stacks so the buttons are easy to tap:
Or use a YouTube video
Instead of uploading a file, paste a YouTube link in Or use a YouTube video on the Video tab and click Use YouTube link. The video must be Public or Unlisted on YouTube, with embedding allowed.
- It plays inside the lesson in YouTube's own player. Seat time counts while it plays, and students must still watch 95% before the lesson can be completed.
- The length is read from YouTube the first time you open the Video tab, and it sets the lesson's minutes.
- A YouTube video has no watermark, and students can open it on YouTube. Upload a file for content you need to protect.
- Uploading a file later takes the place of the link; adding a link moves an uploaded file to History.
4. Add a presentation
On the lesson, open the Presentation tab, choose a PDF or PowerPoint (up to 100 MB) and click ⬆ Upload presentation. Students see it under the video and can open it in a new tab.
A lesson can also have only a presentation and no video. It can then be sent for review as it is.
5. Lesson plans (staff only)
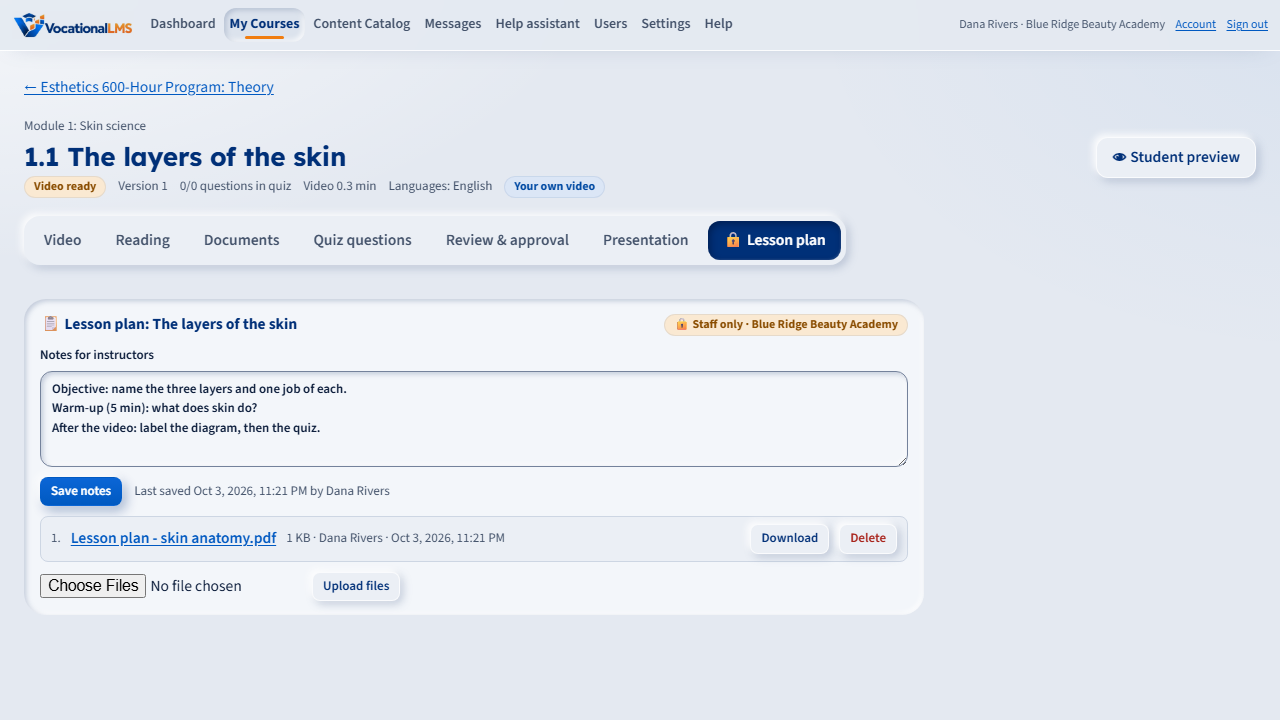
Every lesson and every module can hold a lesson plan: notes for instructors and files (PDF, Word, PowerPoint, Excel, pictures or text, up to 50 MB each).
- On the course page click 📋 Plan on a module, or 📋 on a lesson row. On a lesson page use the 🔒 Lesson plan tab.
- Type the notes and click Save notes. Choose files and click Upload files.
- The number on the button shows how many plan items are there.
6. Write the quiz
Open the lesson's Quiz questions tab.
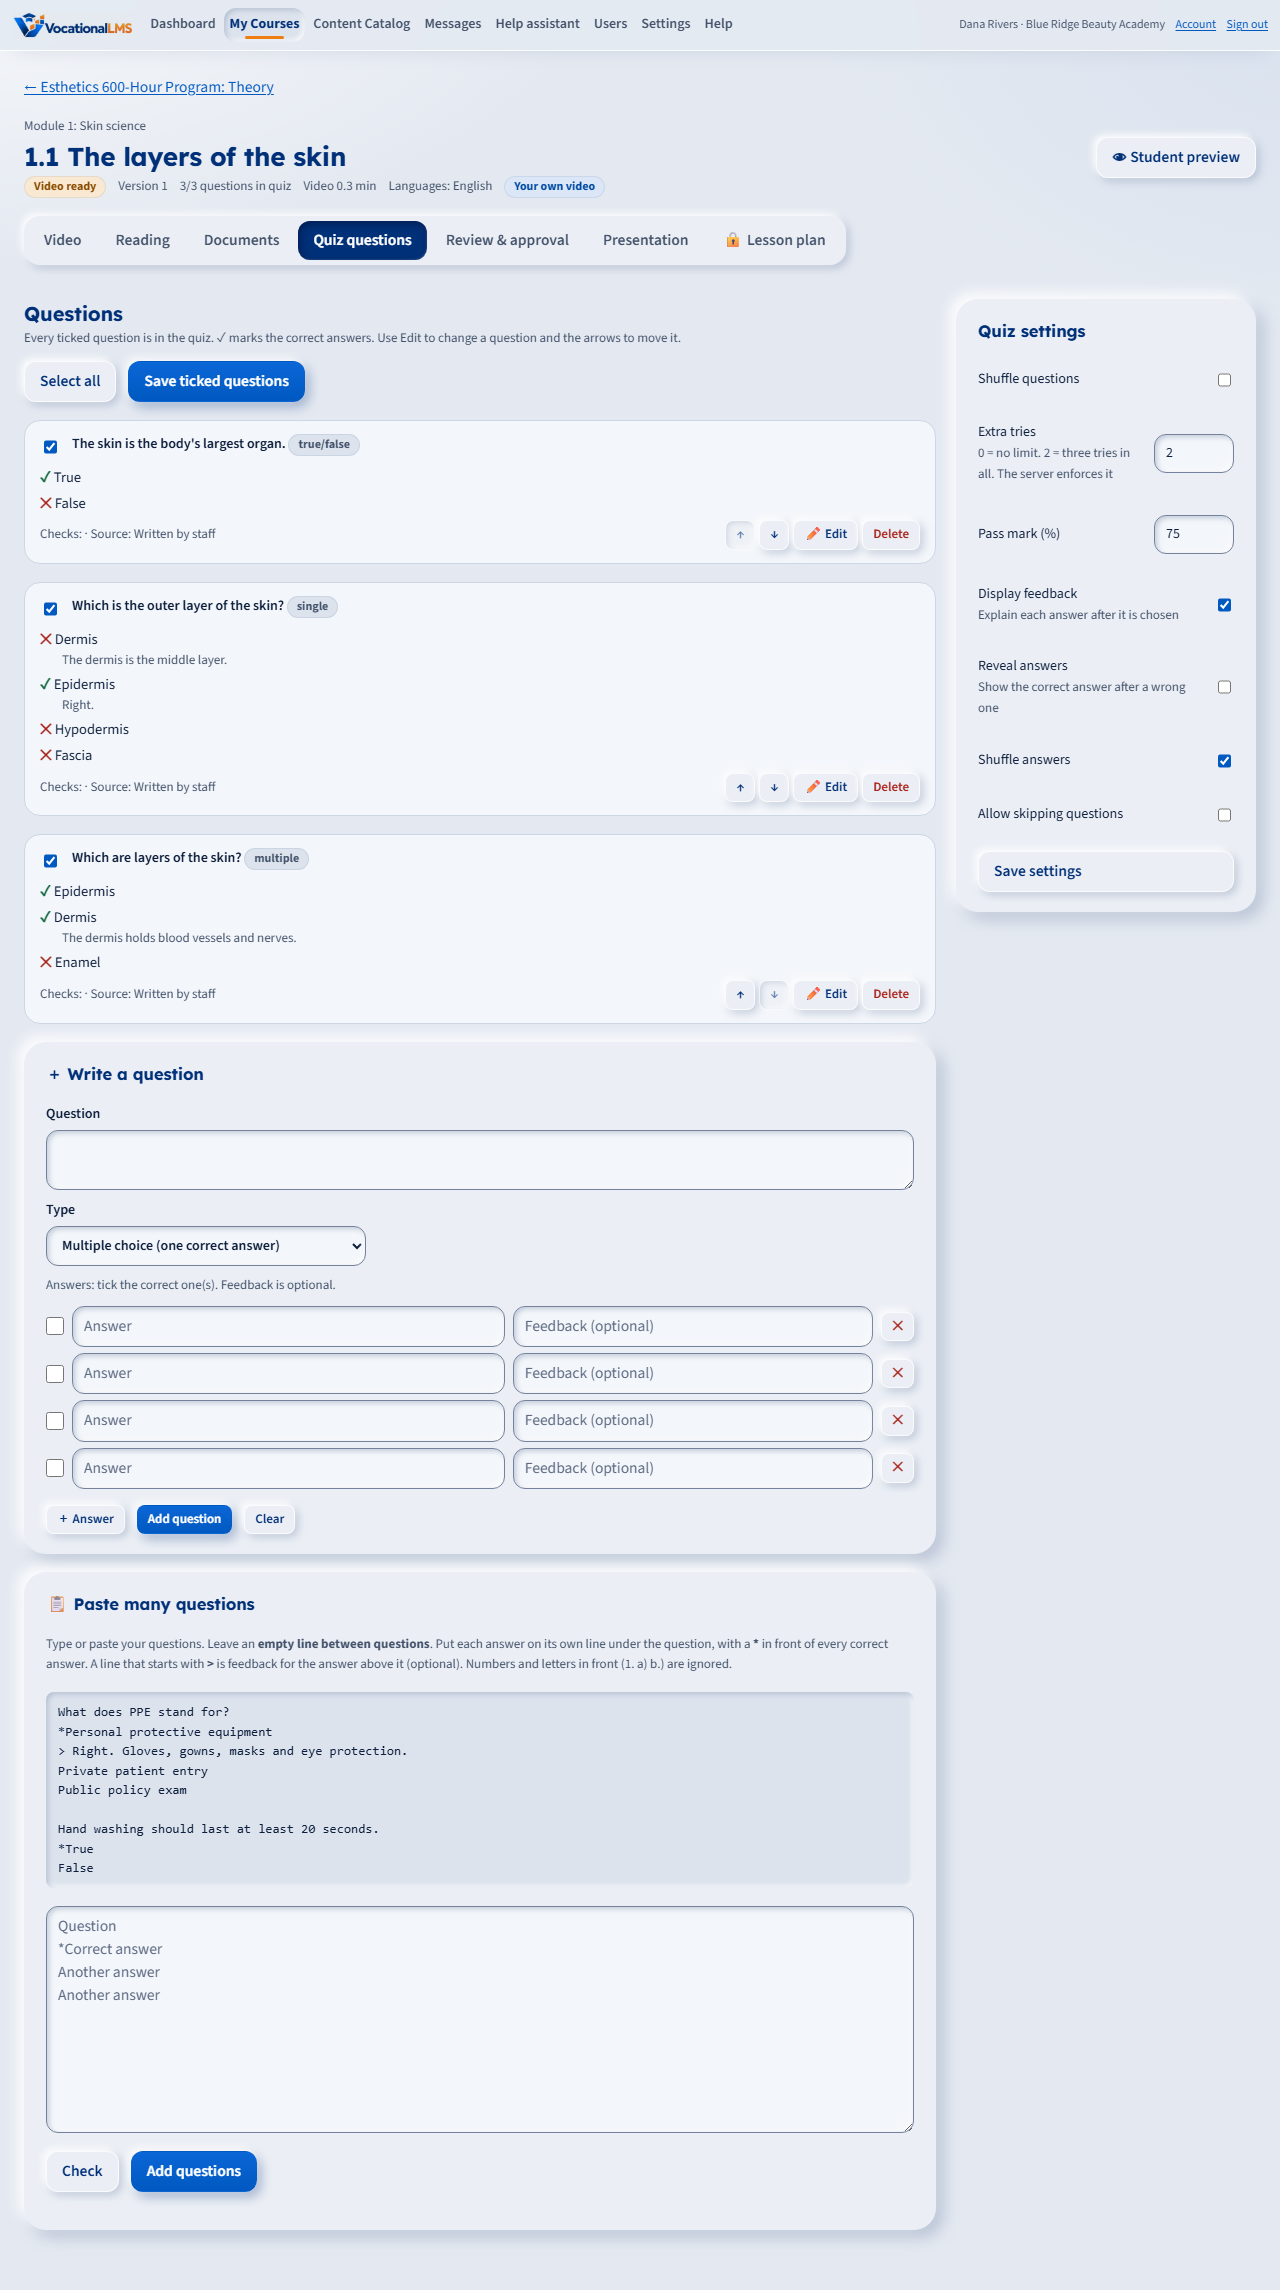
- + Write a question: type the question, pick the type (Multiple choice, Multiple answer or True / false), type the answers, tick the correct one(s), add feedback if you want, and click Add question. + Answer adds another answer line (up to 10).
- ✏️ Edit changes a question. ↑ ↓ move it. Delete asks you to click twice.
- Quiz settings (right side): Pass mark, Extra tries (0 = no limit; 2 = three tries in all), Shuffle questions and Shuffle answers. Click Save settings.
Paste many questions at once
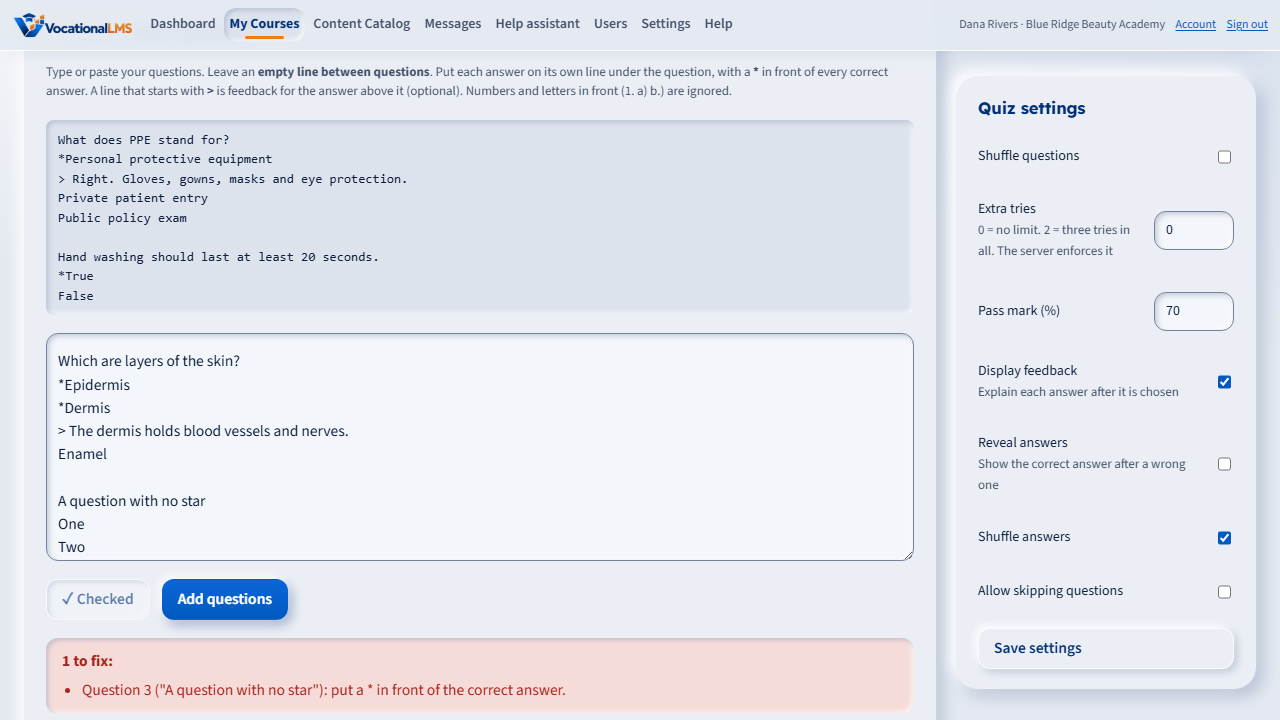
In 📋 Paste many questions, type or paste your questions like this. Leave an empty line between questions and put a * in front of every correct answer:
What does PPE stand for?
*Personal protective equipment
> Right. Gloves, gowns, masks and eye protection.
Private patient entry
Public policy exam

Hand washing should last at least 20 seconds.
*True
False
A line that starts with > is feedback for the answer above it (optional). Click Check to see how the questions were read, then Add questions. If something is missing (for example, no *), the page tells you which question to fix and adds nothing until it is fixed.
Quizzes are graded on the server. Students never receive the answers before they submit.
7. Chapter tests and final exams (Assessment)
- On the course page click + Assessment on a module.
- Pick the kind (Chapter test, Final exam or Quiz), and check the Title, Pass mark, Time estimate and Extra tries.
- Click Create assessment. It opens on its Questions tab; write or paste the questions.
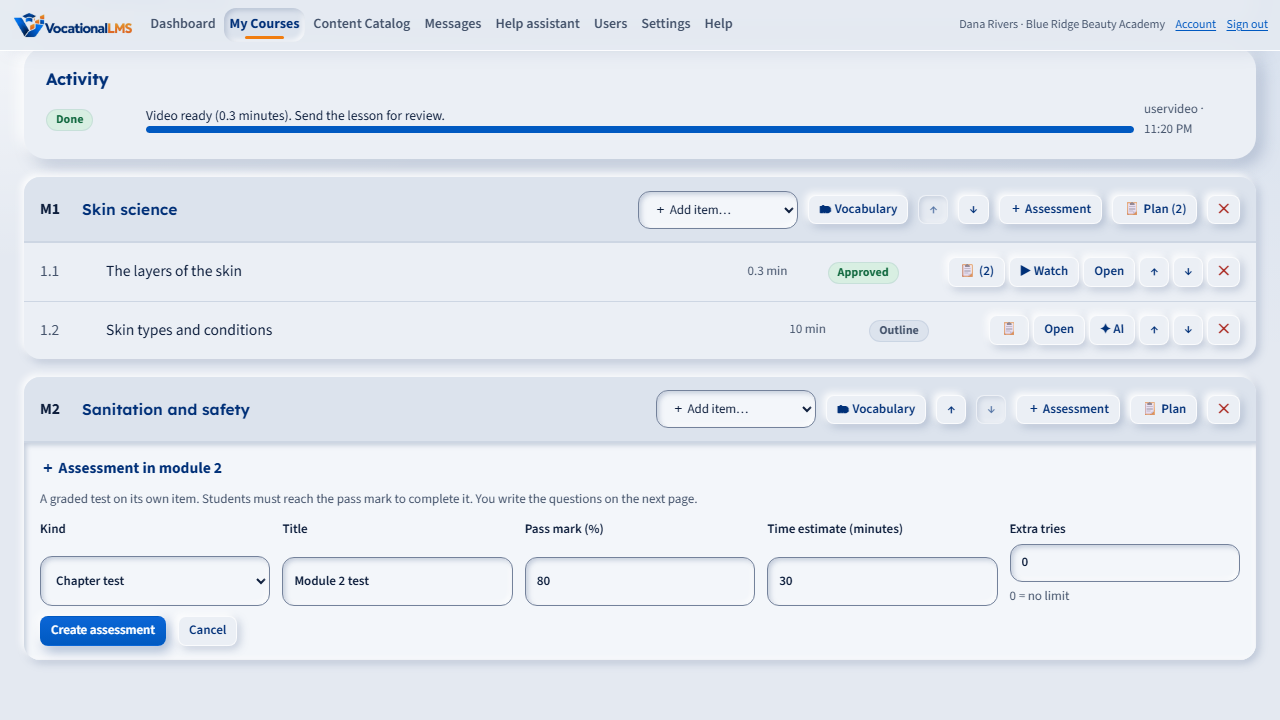
The time estimate is shown to students; it is not a timer.
If an AI build of your course stopped
When a course your school builds with AI stops part-way (a provider out of credits, a key problem, a VocationalLMS update), its card says Build stopped and why, and the course page shows a Resume build panel: the reason, What is left, and a button that continues with only the unfinished lessons, videos, readings and tests after a pre-flight check of the providers. Nothing already built is paid for twice. See A-82.
Pictures on the slides of the videos you build
When your school builds a lesson video with AI, every slide that can carry a picture gets a realistic photograph of the activity it teaches, in the setting of the course's trade, paid from the course's AI building budget like the rest of its video. Choose Follow VocationalLMS, On or Off under Configuration › Lesson pictures. A course built before this has Add pictures to lessons on its page: the pictures are made and the videos drawn again with the narration already recorded; approved lessons stay approved. See A-83.
8. Review and approve
Nothing reaches students until it is approved. On each item open Review & approval, click Send for review, then the reviewer types their name and clicks ✓ Approve lesson. If you change the video, captions, presentation or a question of an approved item, it goes back for review and the earlier version is kept in the history.
To add students, use the Students box on the course page. See Courses for schools and students.
Limits
| # | What | Limit |
|---|---|---|
| 1 | One video | MP4, MOV, M4V or WebM, up to 4 GB and up to 6 hours |
| 2 | Captions | .vtt or .srt, up to 2 MB |
| 3 | Presentation | PDF, .pptx or .ppt, up to 100 MB, one per lesson |
| 4 | Lesson-plan file | Up to 50 MB each |
| 5 | Storage per school | 50 GB to start with (videos, presentations and lesson plans). The Super Admin can raise it on the course page. |
Only upload material your school made or has the right to use.