
Courses for schools and students
VocationalLMS builds and maintains the master courses. The Super Admin gives a course to a school, the school adds its students, and each student sees only their own courses and only lessons that a licensed instructor has approved.
1. Give a course to a school (Super Admin)
From the Content Catalog (also works while you are viewing a school):
- Open Content Catalog. You see every VocationalLMS master course, with how many of its lessons are approved.
- Choose the school at the top (when viewing a school, it is that school).
- Tick the courses and click Give selected to the school. They appear right away under that school's My Courses and in the school's library at the bottom of the catalog. Remove from takes a course back.
From a course page: open the course in AI Course Builder, tick schools under Schools that have this course, and click Save schools.
A course doesn't need to be finished to be given. Students see only the lessons a licensed instructor has approved, so lessons appear for students as they are approved. Make an editable copy instead gives the school its own copy to change; that needs every lesson approved first.
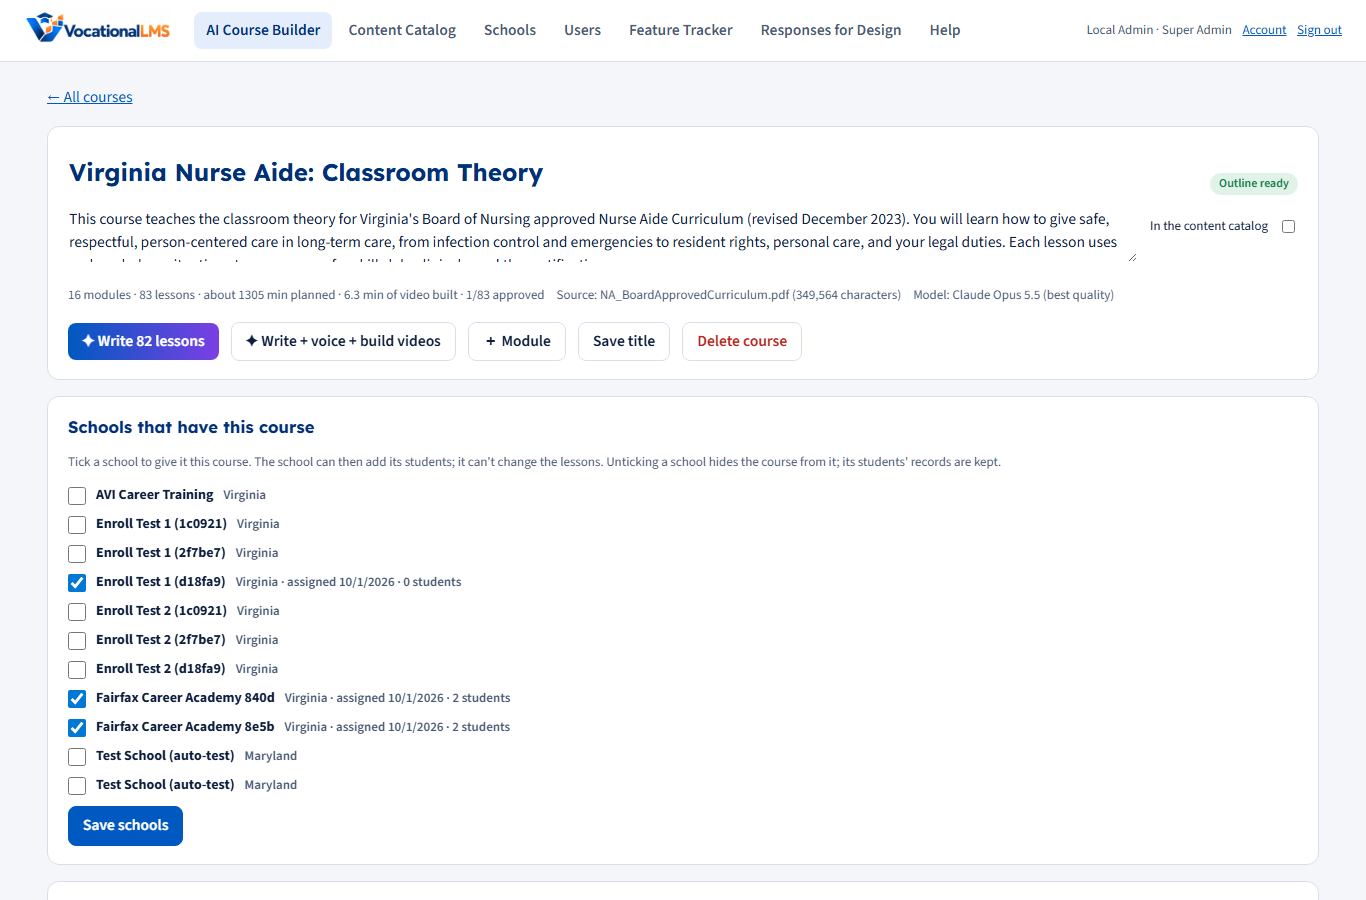
Unticking a school hides the course from that school. Its students' records are kept, so ticking the school again brings everything back.
2. Add students to the course (School Admin)
- Open My Courses and open the course. It's marked Assigned by VocationalLMS.
- Click + Add students and type one student per line as
Name, email. You can also paste the two columns straight from a spreadsheet. - Click Add to course. Each new student gets a one-time invitation link and chooses their own password. Someone who already has a student account at your school is simply added to the course.
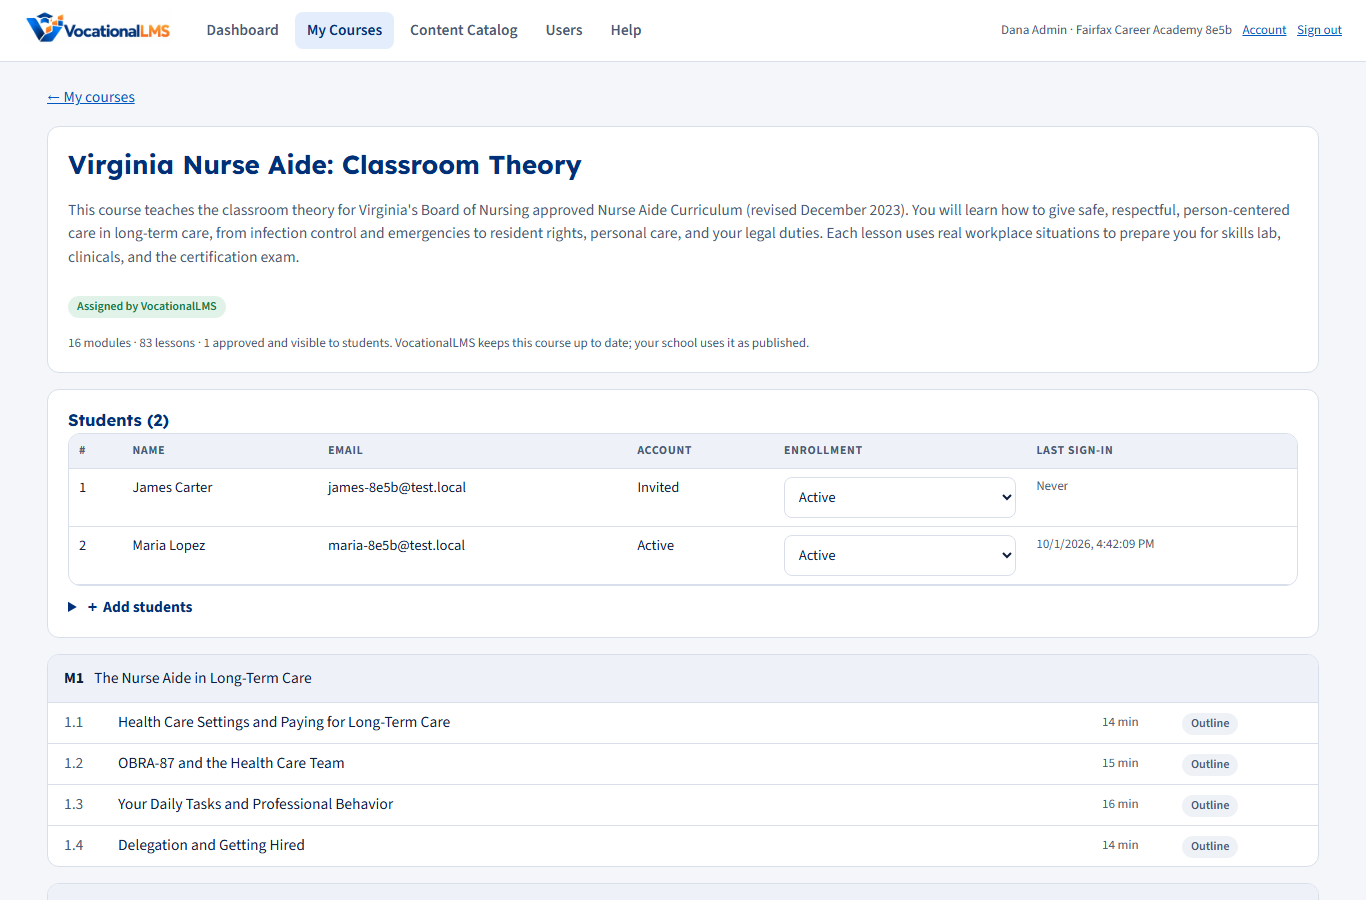
- Account shows Invited until the student chooses a password, then Active.
- Enrollment can be set to Active, Completed or Withdrawn. A withdrawn student immediately loses access to the course. Nothing is deleted.
- A school uses an assigned course as published. VocationalLMS keeps it up to date, and the school can't change its lessons.
- Each school sees only its own students. A Super Admin can also add students and picks the school first.
Until email delivery is set up, the invitation links appear on screen. Copy each link and send it to the student yourself. It's a link, not a password, it works once, and it expires after 72 hours.
3. Instructors for a class (School Admin or Director)
A class is one course at your school. Each class can have one or more instructors; one of them is the main instructor. Students' new messages go to their instructor, and so do the questions the student help assistant can't answer.
- Open My Courses and open the course.
- Under Instructors for this class, tick Teaches for everyone who teaches this course.
- Mark one of them as Main.
- Click Save instructors.
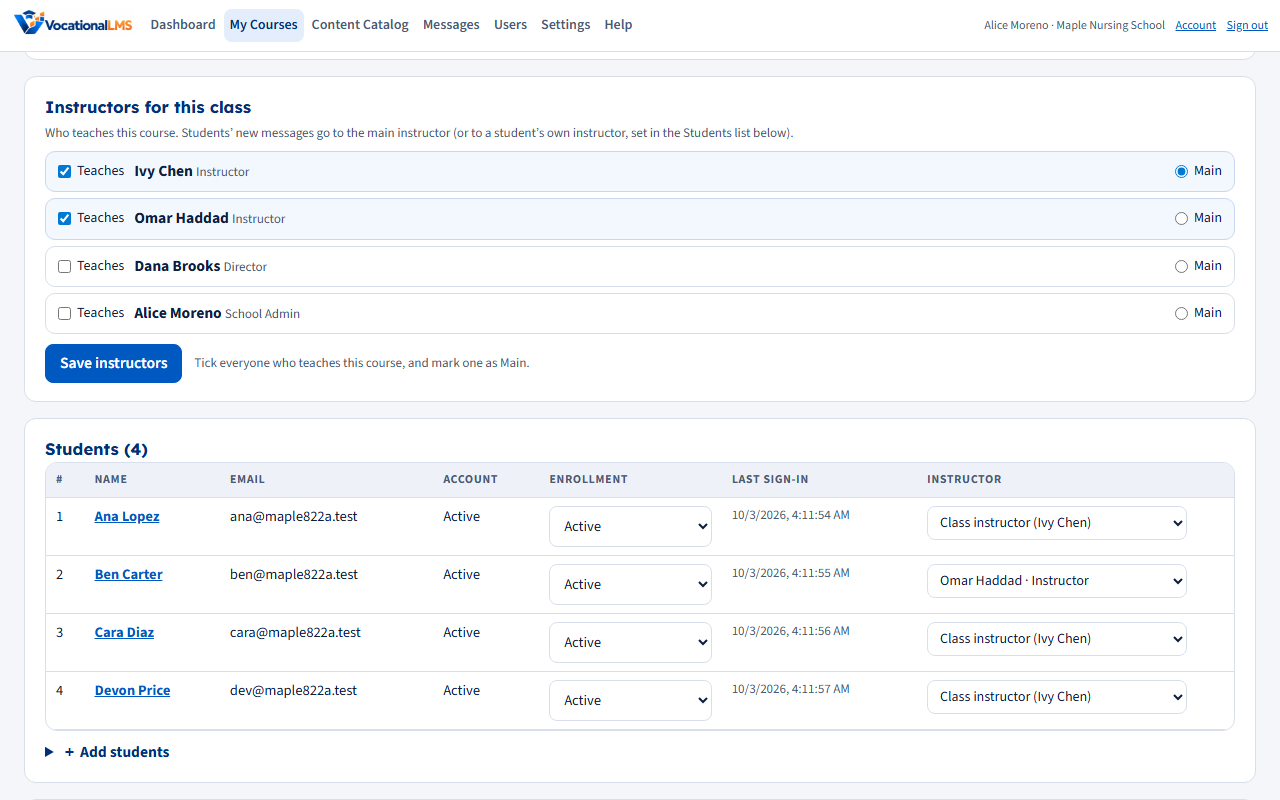
One student's own instructor: in the Students list, the Instructor column shows each student's instructor. Leave it on Class instructor to follow the class's main instructor, or choose a person to give that student their own instructor (for example, for a make-up group). It saves as soon as you choose.
- School Admins and Directors choose instructors for their own school. The Super Admin can do it for any school (choose the school in the panel).
- Instructors can see who teaches a class but can't change it. On the course page, their own students are listed first and marked Yours.
- A student's profile has an Instructors table with their instructor in each course (admins can change it there too).
- If a class has no instructor yet, students' messages go to the School Admin (or the Director).
- You can pick Instructors, Directors and School Admins of your school. Add new instructors under Users first (role: Instructor).
Module order and unlocking modules
- The rule: a student's next module opens when every item of the module before it is complete. The first module is always open, and a module the student already started or finished stays open. It is on by default.
- Turn it on or off: School Admin, Configuration > 🔒 Module order. Off lets students open any module in any order.
- Open modules for a course: on the course page, the panel 🔒 Module access for students lets a School Admin, a Director, or an instructor of that course unlock one module, all modules, or a module for one student, and put them back in order. History shows who did what.
- Students see a lock on a module that is not open yet, with what to finish first. Resume and Next never point into a locked module.
- Hours, scores, completion and transcripts are not changed. See A-26 and I-13.
4. What the student sees
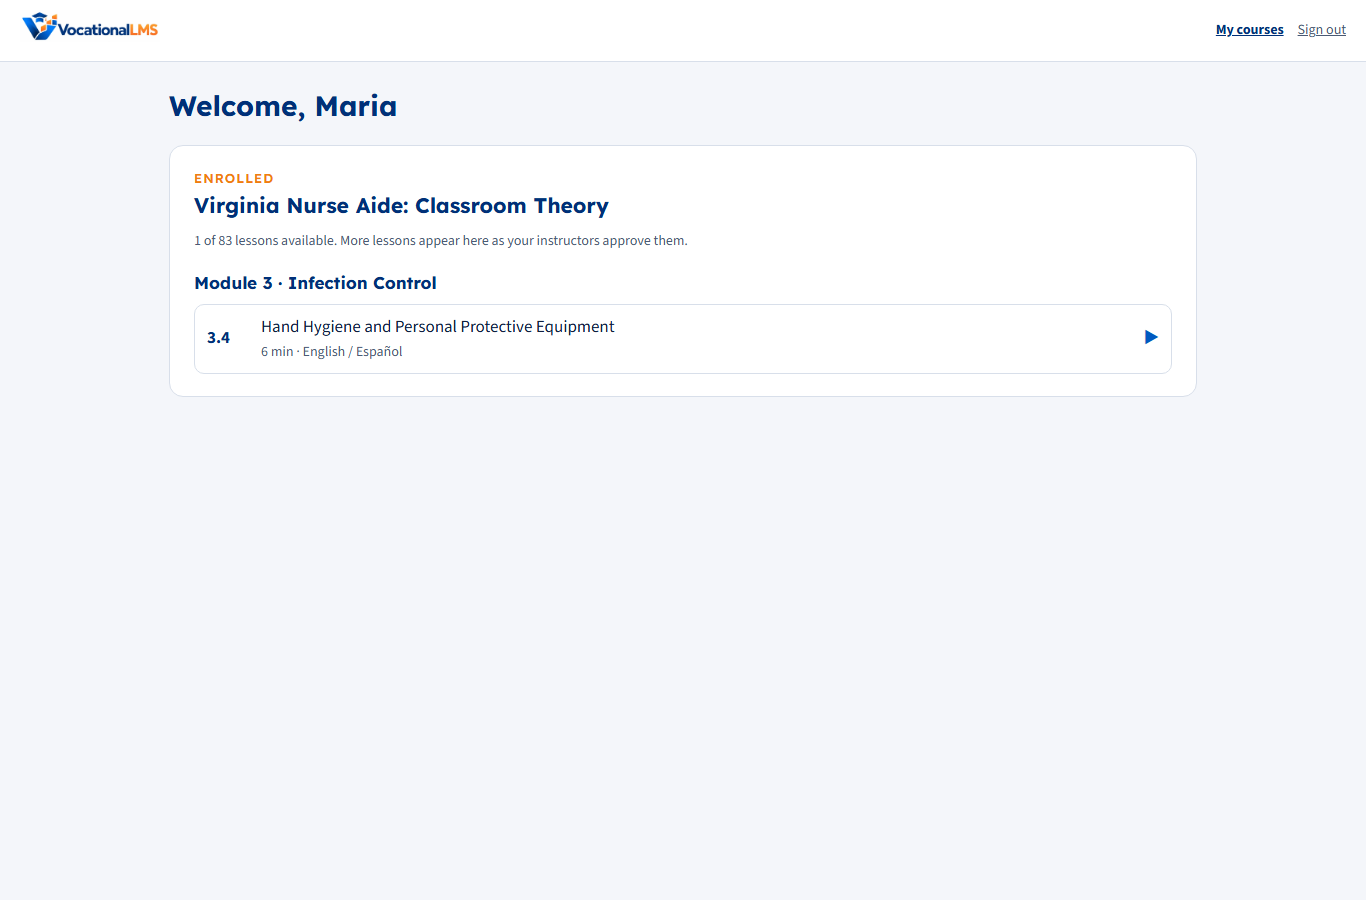
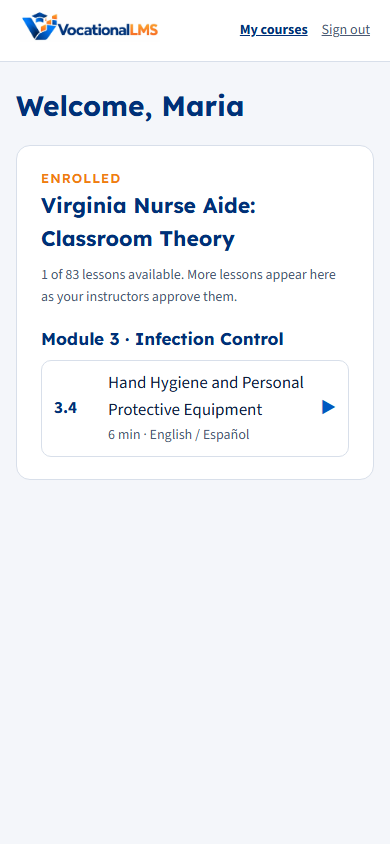
After signing in, a student lands on My courses. It lists their courses and, within each one, only the lessons a licensed instructor has approved. New lessons appear as they're approved. A lesson opens in the protected video player, followed by the reading and the quiz. Students never see the Studio.
Lesson videos can't be downloaded. They stream encrypted, each viewing link works only for the signed-in student who opened it, and the student's email moves across the video as a watermark.