
Students' own documents and links
On the Resources page, students have a section called My documents and links (in Spanish: Mis documentos y enlaces). There they can keep their own study files and the websites they want to come back to, next to the documents of their courses.
Who can see them: the student, and the staff of the student's school (School Admins, Directors, Instructors) and the Super Admin. Staff can only look and download; they can't change or delete anything. Other students never see them, unless the owner shares an item with them.
How-to video (1.5 minutes)
For students: where to find it
Click Resources at the top of any page. My documents and links is the first box on the page. The bar under the title shows how much of your 300 MB of space you are using.
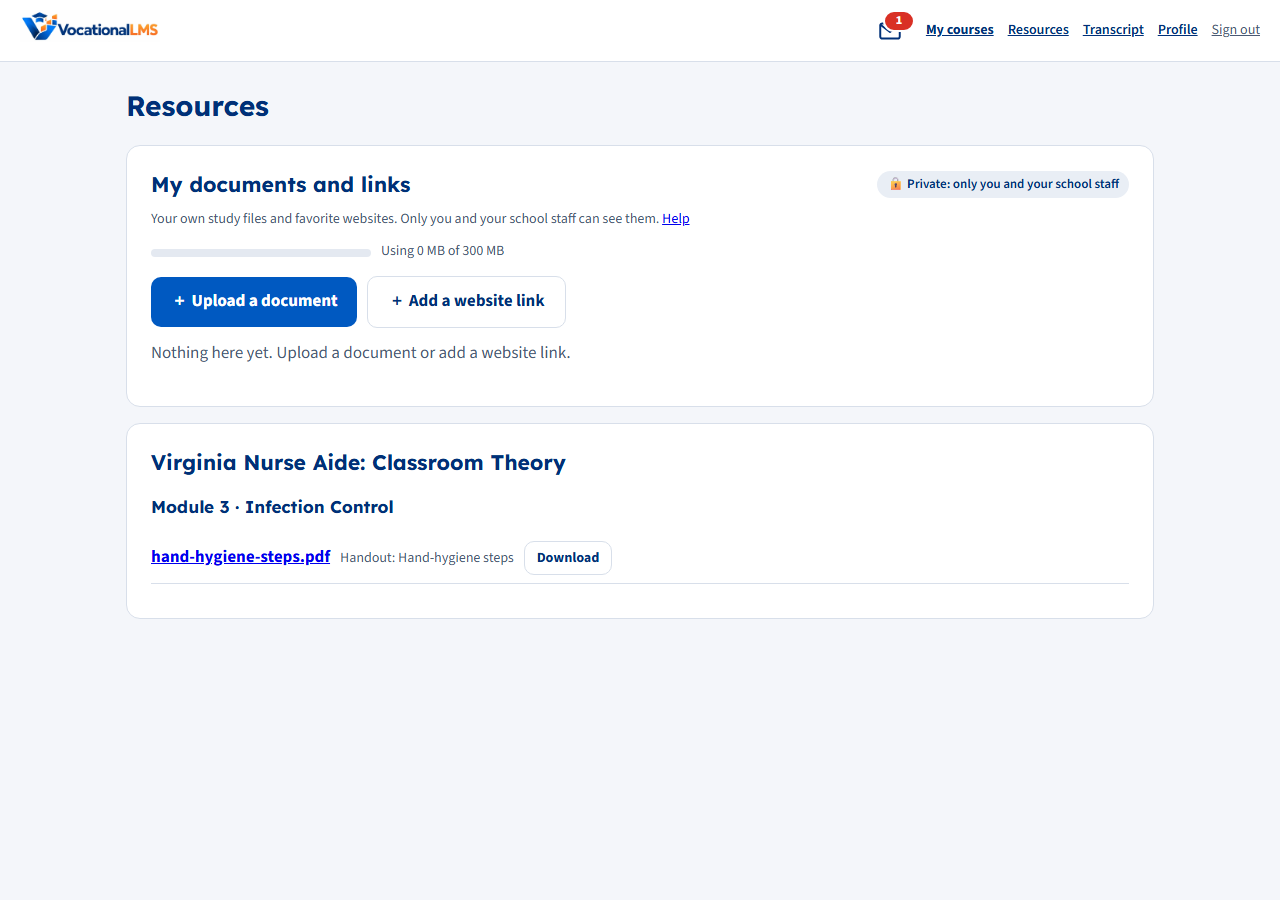
Upload a document
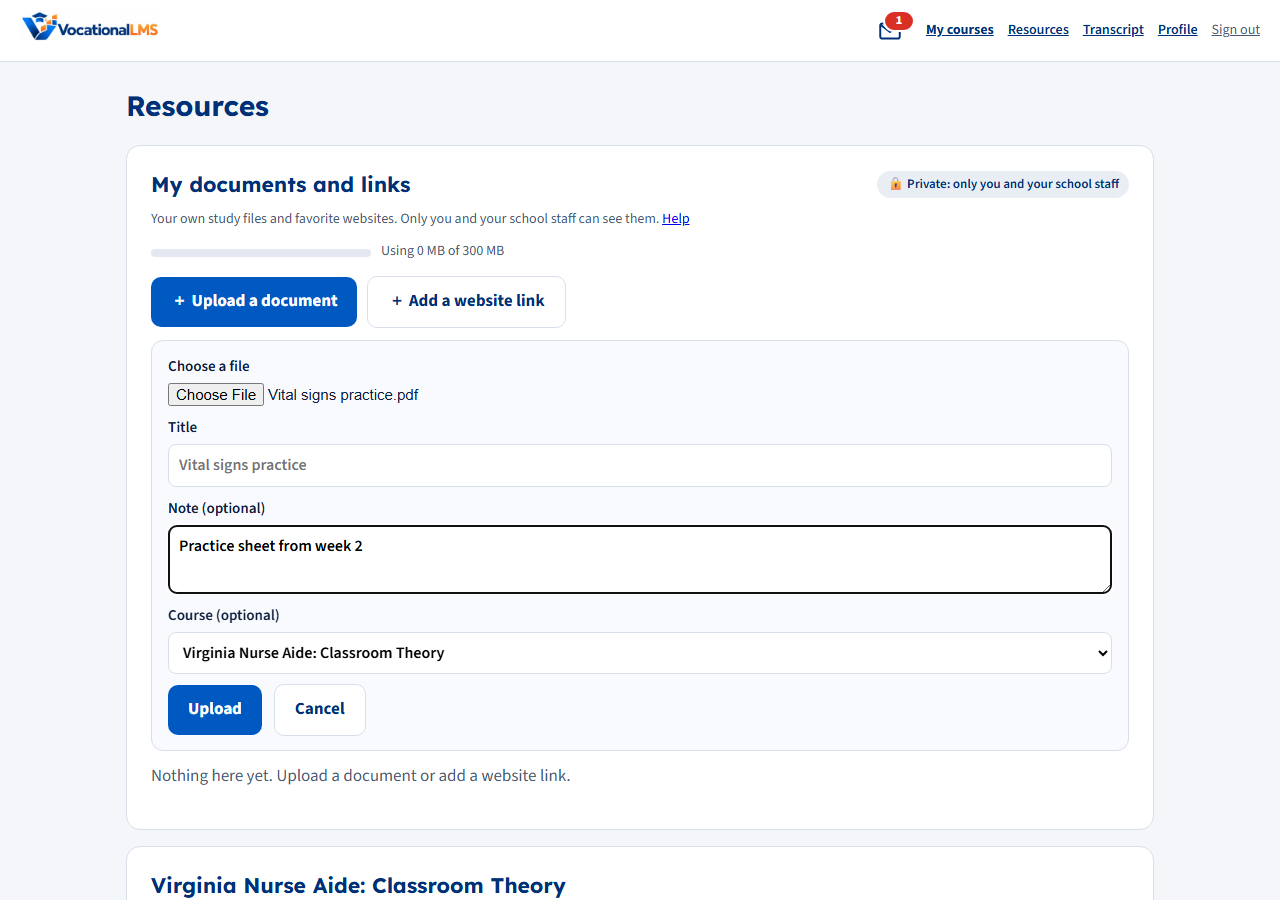
- Click + Upload a document.
- Click Choose a file and pick the file on your computer or phone.
- Type a Title if you want one. If you leave it empty, the file name is used.
- Add a Note (optional), for example what the file is for.
- Pick the Course it belongs to (optional).
- Click Upload. The document appears at the top of the list.
| # | Rule | Details |
|---|---|---|
| 1 | File types | PDF, Word (.doc, .docx), PowerPoint (.ppt, .pptx), Excel (.xls, .xlsx), pictures (.jpg, .png, .gif, .webp) and plain text (.txt). |
| 2 | Size of one file | Up to 25 MB. A larger file is refused with a message. Tip: save a big Word or PowerPoint file as a PDF to make it smaller. |
| 3 | Space per student | 300 MB in total. Website links use no space. When the space is full, delete some documents first. |
| 4 | Safety check | The file must really be what its name says. For example, a web page renamed to ".pdf" is refused. |
Save a website link
- Click + Add a website link.
- Paste the Website address. If you leave out
https://, it is added for you. - Add a Title, a Note and a Course if you want. Without a title, the website's name is used.
- Click Save link.
Only normal web addresses (starting with http:// or https://) can be saved. Anything else, such as javascript: or data: addresses, is refused, so a link can never run code. Links always open in a new tab and show the website's name (for example cdc.gov) so you can see where they go.
Open, download, edit and delete
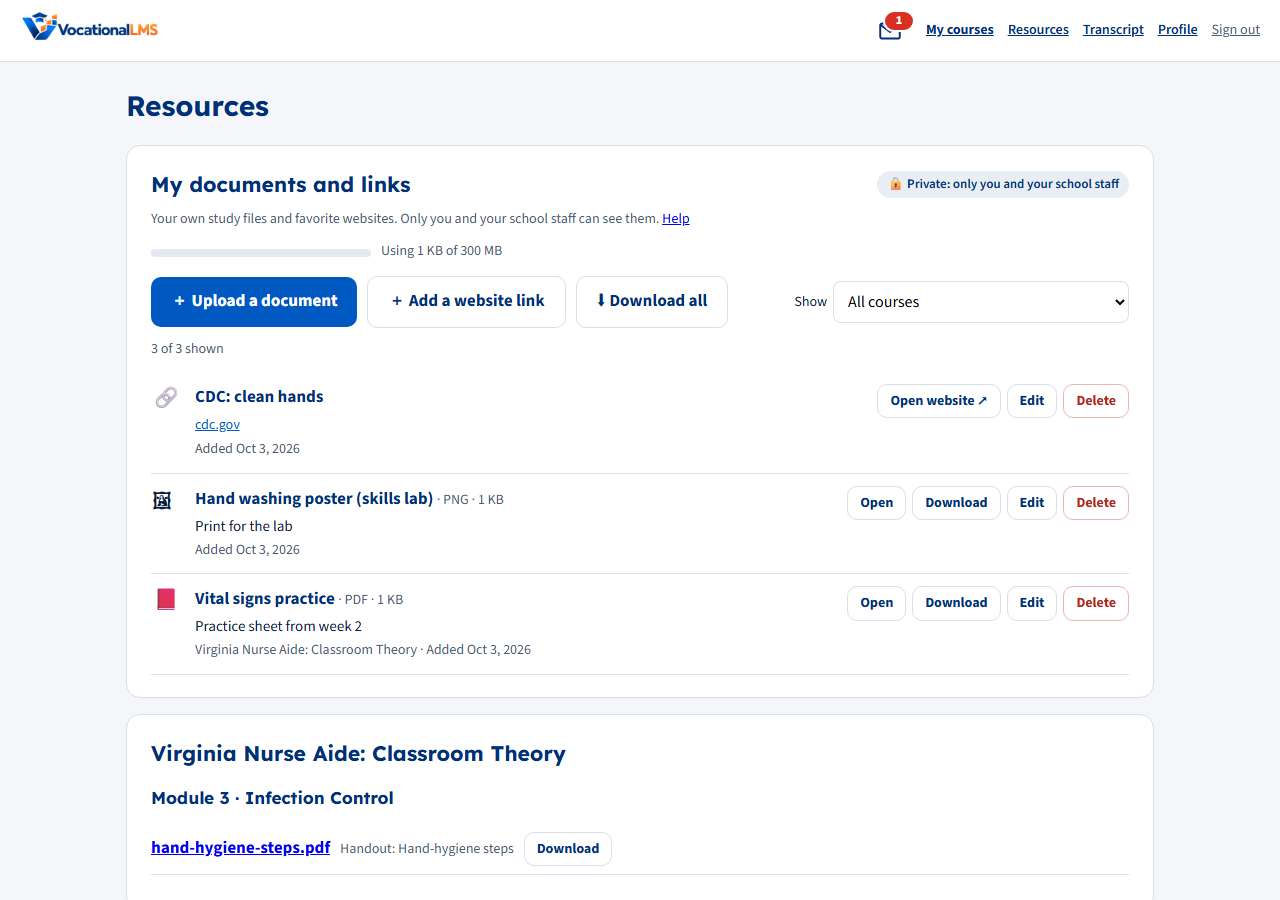
- The list is newest first. Use Show to see only the items of one course, or the ones not linked to a course.
- Open shows a PDF, picture or text file right on the page. Word, PowerPoint and Excel files can't be shown in a browser, so Open downloads them.
- Download saves a copy to your device. ⬇ Download all saves every document in one ZIP file, with a list of your website links.
- Open website ↗ opens a saved link in a new tab.
- Edit changes the title, the note, the course (and, for a link, its address). Click Save.
- Delete asks first: the button turns red and says Click again to delete. Click it again within 5 seconds to delete. A deleted document can't be brought back.
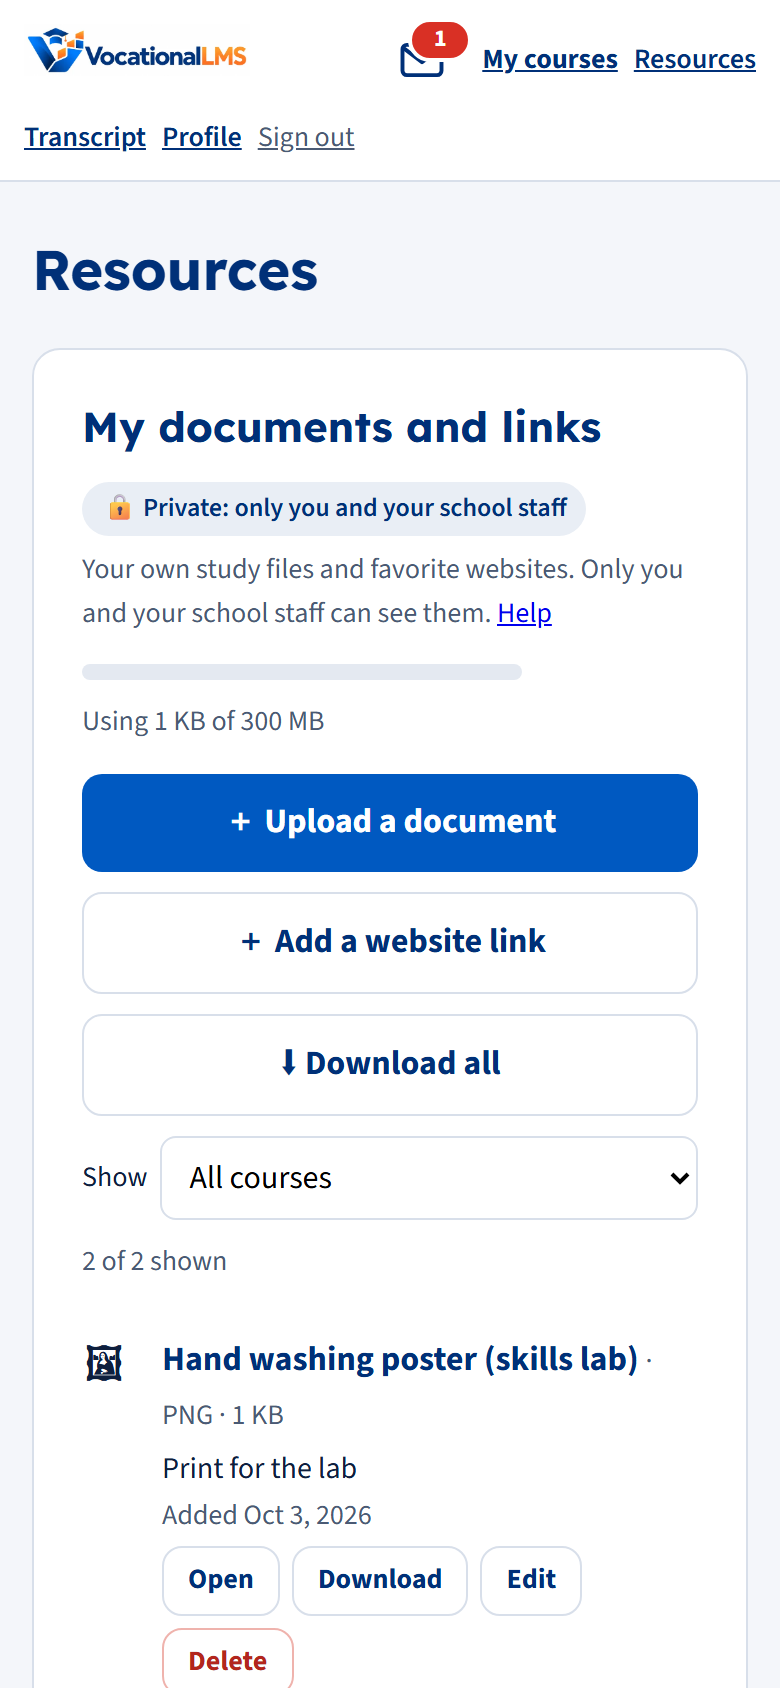
On a phone, the buttons stack so they are easy to tap:
Share a document or link with other students
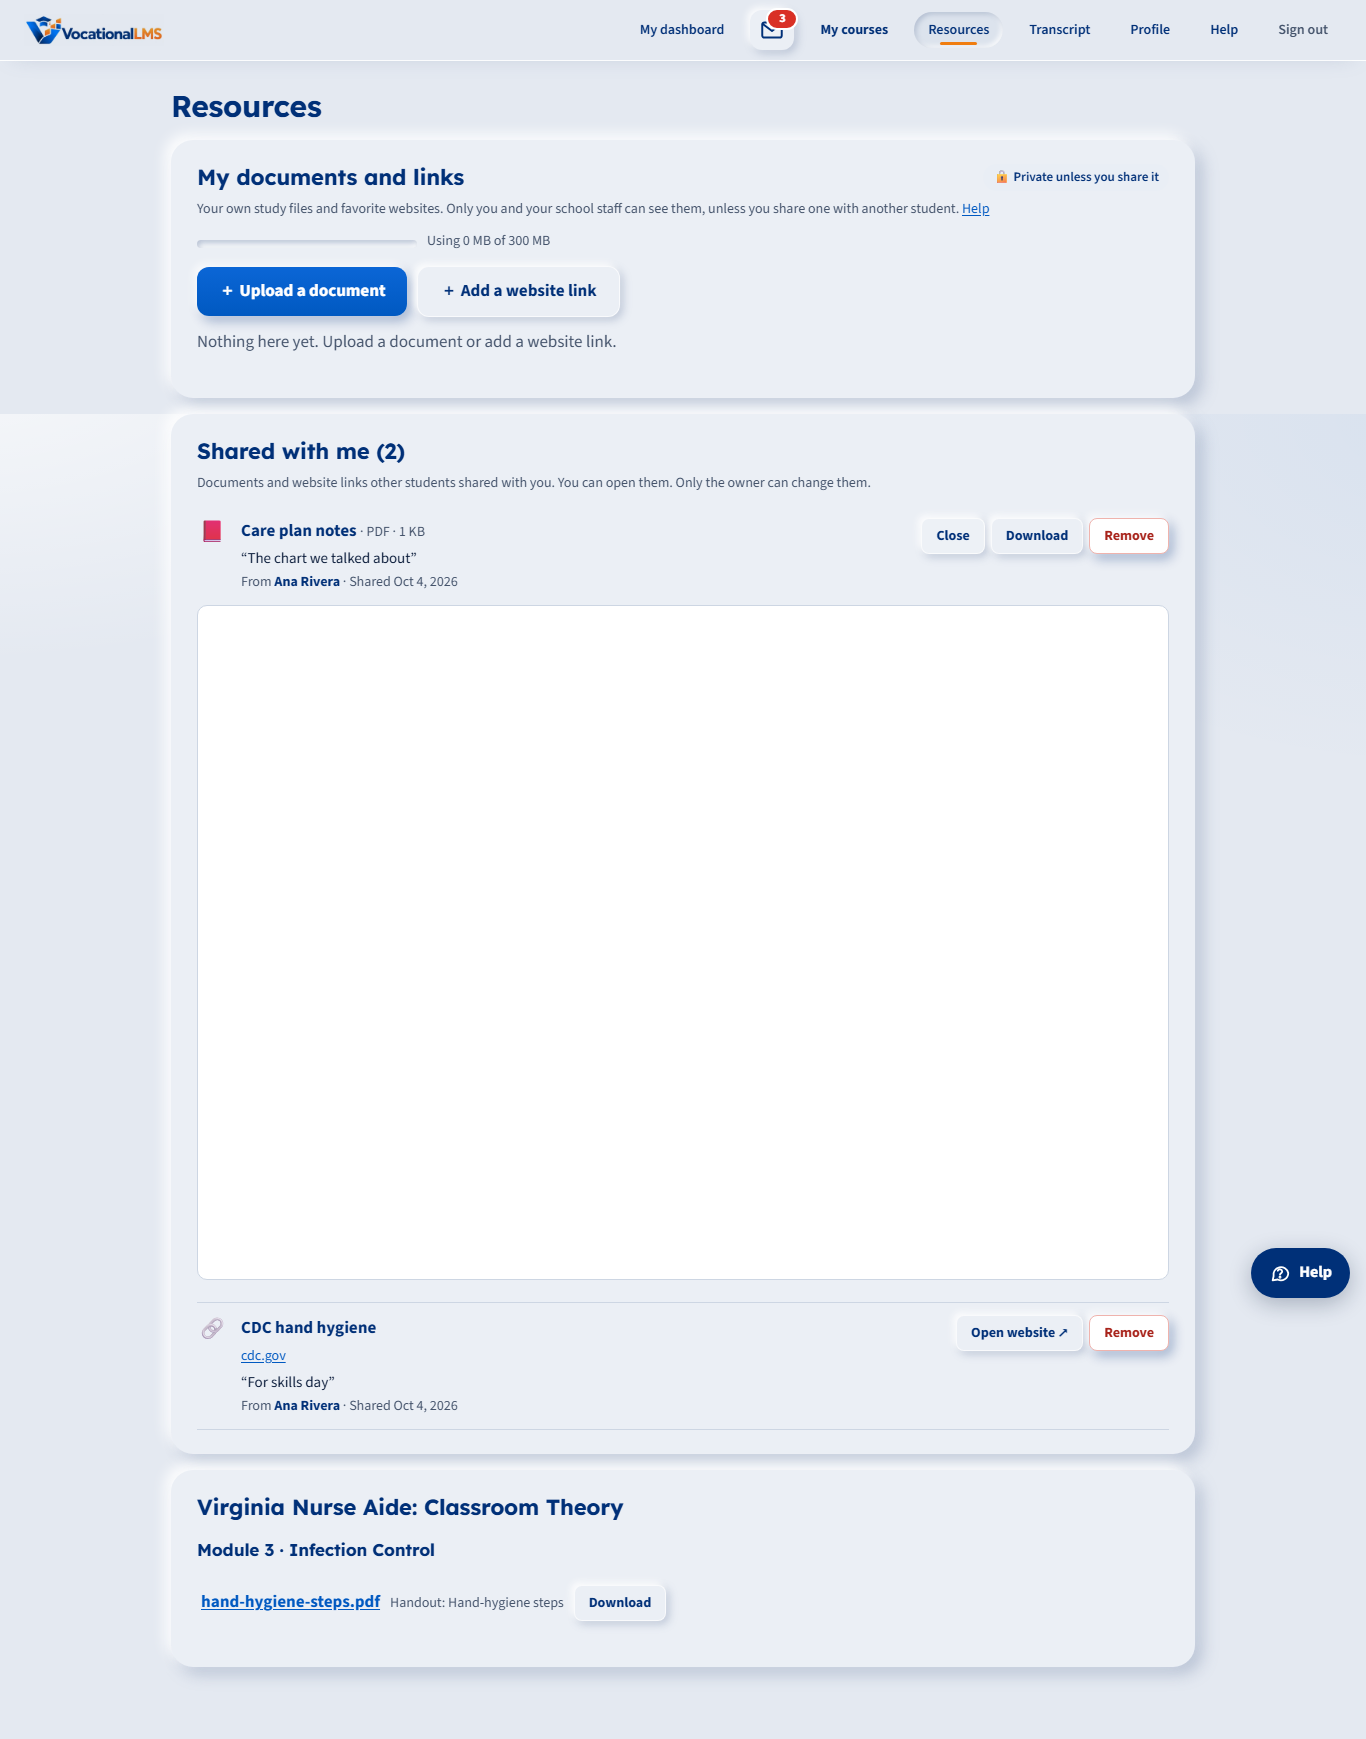
You can let other students of your school open one of your documents or website links. They see it on their own Resources page under Shared with me (in Spanish: Compartido conmigo). They can open and download it, but they can't change it, delete it or share it again.
- Next to the item, click Share.
- Type the email address each student signs in with. For several students, put a comma between the addresses or type one on each line (up to 10 at a time).
- Add a short note if you want (up to 300 characters).
- Click Send. The page tells you how many students it was sent to.
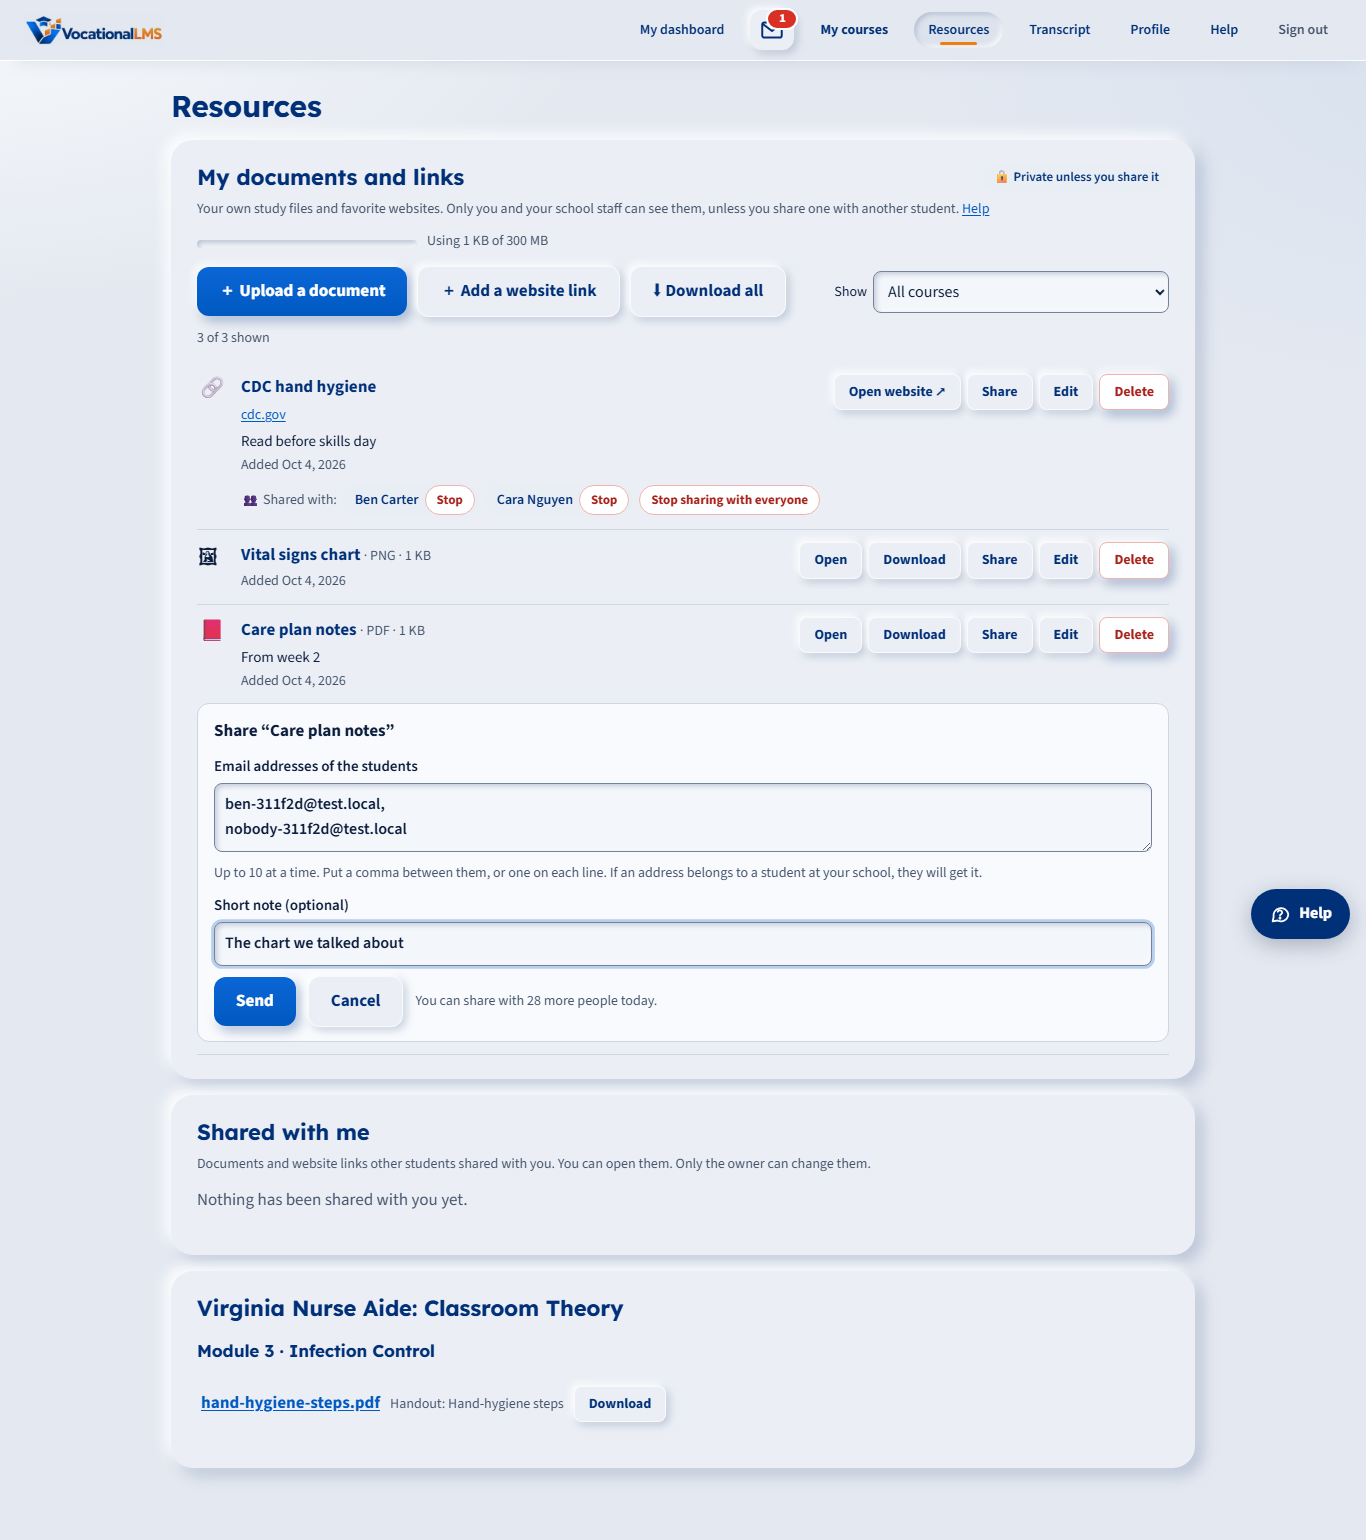
The page always answers the same way: "If an address belongs to a student at your school, they will get it." It never says whether one address is a student or not. Addresses of staff, of students at another school, and of students who have left are not sent anything.
| # | What happens | Details |
|---|---|---|
| 1 | The other student is told | They get a message under their mail icon ("Ana shared a document with you: …") and a short email. The email never contains the document; it only has a link to sign in. |
| 2 | It is not a copy | The other student reads your original. It uses none of their space, and if you rename it they see the new name. |
| 3 | You see who has it | Under the item: Shared with and the names. Click Stop next to a name (twice, to confirm) to stop sharing with that person, or Stop sharing with everyone. |
| 4 | Deleting ends it | If you delete the item, nobody you shared it with can open it any more. |
| 5 | Limits | You can share with up to 30 people in 24 hours, and one item with at most 50 people. |
Shared with me
Items other students shared with you show the title, who shared it, the date and their note. Use Open, Download or Open website ↗. Remove (click twice) takes an item off your list; the owner keeps the original.
On a phone, in Spanish:

Mobile number (text messages)
The Profile page has a Mobile number box. Text messages are not turned on yet, so sharing works by email address only; a number you save is kept for later. When VocationalLMS turns text messages on, you confirm your number with a code sent by text, and classmates can then share with you by typing your mobile number.
For School Admins: turn sharing on or off
Open Settings. Under Sharing between students, tick or untick Students may share their own documents with other students. It is on for a new school and takes effect right away. The Super Admin can change it too, on the Configuration page.
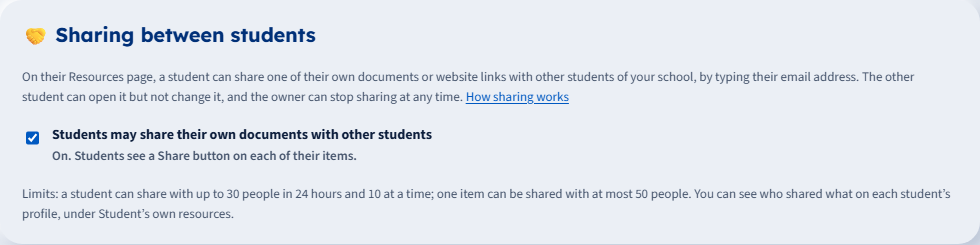
When it is off: the Share button and the Shared with me list are hidden, the server refuses new shares, and items that were already shared can't be opened. Nothing is deleted; turn it on again and they work as before.
For staff: Student's own resources
Open a student (Courses → a course → the student, or any link to the student) and stay on Profile. Below the courses and the Info box is Student's own resources.
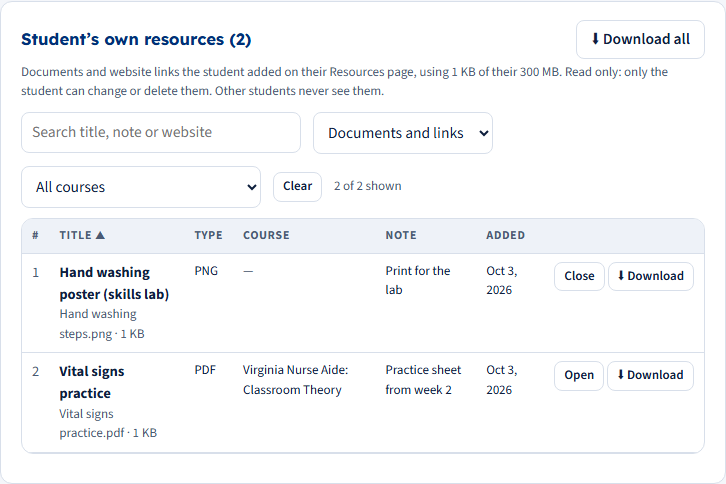
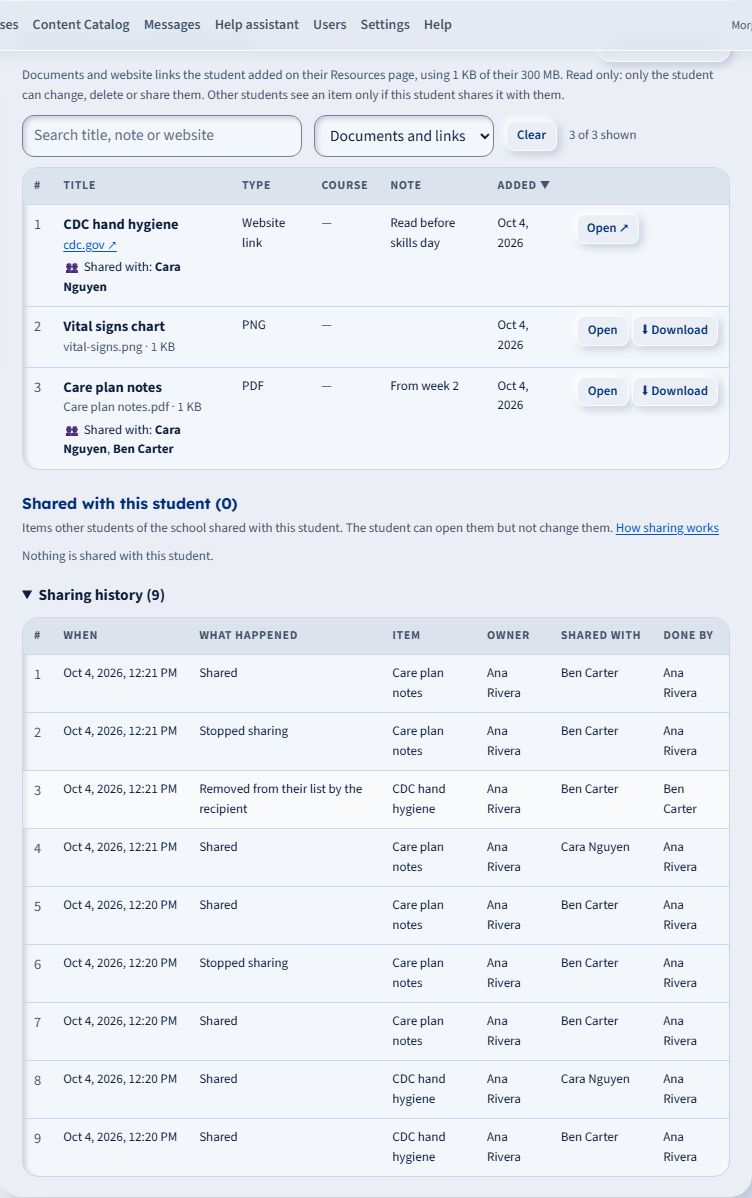
- Search by title, note or website; show only documents or only links; show one course. Clear resets the filters. Click a column heading to sort.
- Open shows a PDF or picture below the table. ⬇ Download saves one document; ⬇ Download all saves them all in one ZIP file.
- The list is read only. Only the student can change, delete or share their items.
- Under an item's title, Shared with names the students it is shared with. Below the table, Shared with this student lists what other students shared with them, and Sharing history keeps every share and un-share: who, what, with whom and when.
- Instructors see this only for students in their own programs. An instructor can open an item shared with their student only if they also teach its owner.
- Staff only see students of their own school. The Super Admin can see every school's students.
Questions
Can classmates see what I upload?
Only if you share it with them. Otherwise only you and the staff of your school can see your documents and links.
I shared something by mistake. What do I do?
Click Stop next to the person's name under the item, then click again to confirm. They can no longer open it.
A student has left the school. Can they still open what I shared?
No. An archived or deleted student can't sign in, and what an archived or deleted student shared stops working too.
Do these documents count toward my hours?
No. Time is only counted while you work on your course lessons.
Why was my file refused?
It is larger than 25 MB, it is a type that can't be added (for example a program or a web page), it doesn't match its name, or your 300 MB of space is full. The message under the buttons tells you which one.
The page follows the student's language (English or Spanish), the same as the rest of the student pages.