
A-95For School Admins and Directors
Build a form once, send it to a student to sign, and follow it
Build a reusable form by dragging fields onto the page, publish it, send it to one student or a whole group, and see who has signed. The school's real forms are ready as starters.
How-to video A-95 · 0:58
Read the words of this video
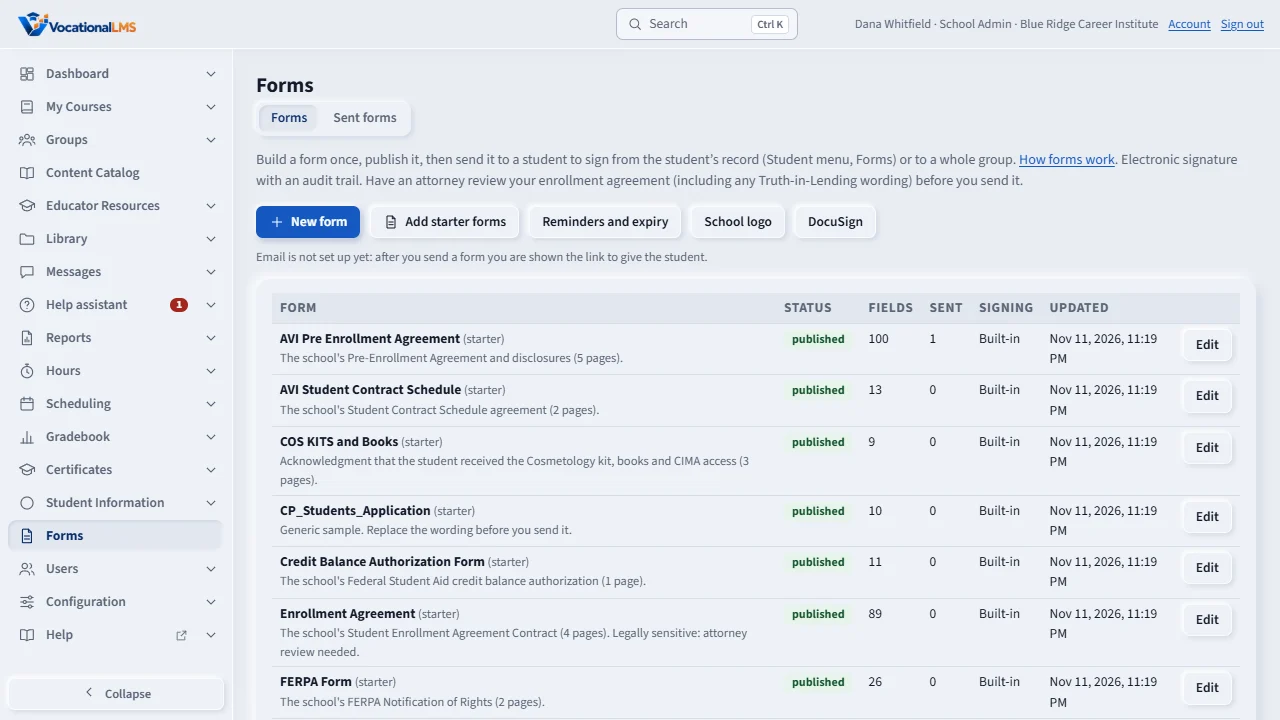
Open Forms in the Studio menu. A form is built once as a template and used for every student. Add starter forms gives you your school's real forms to edit.
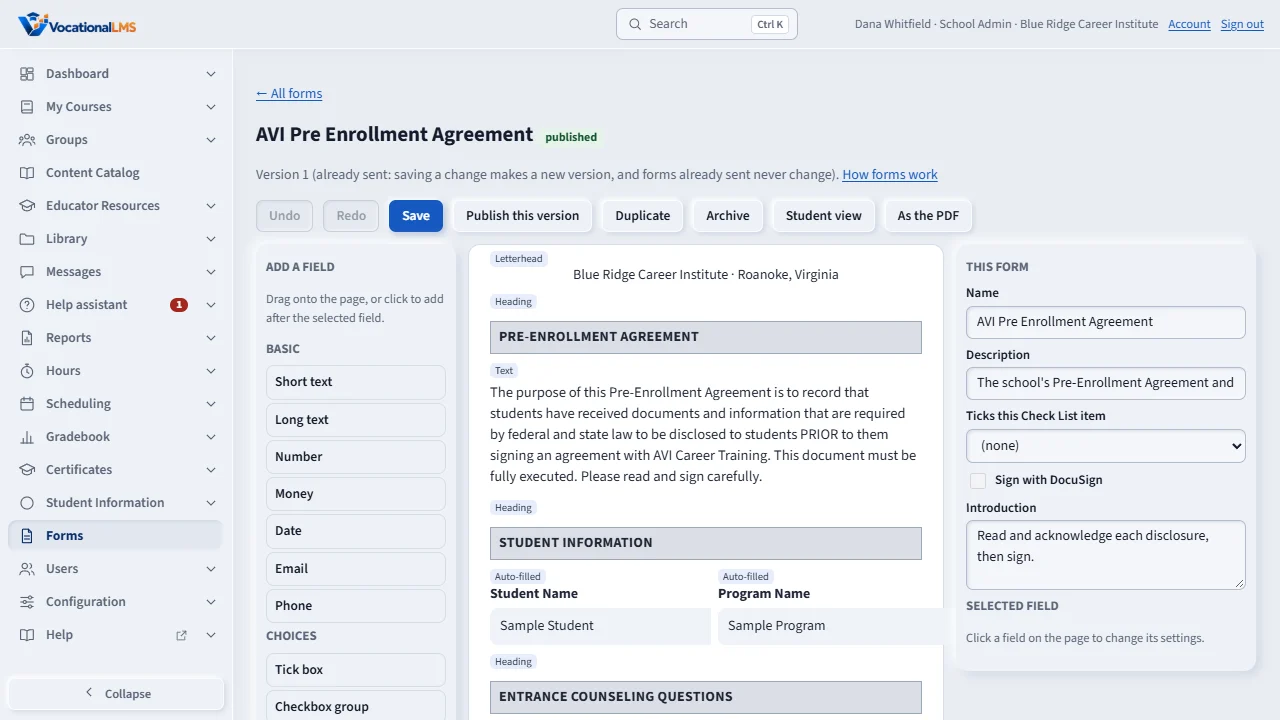
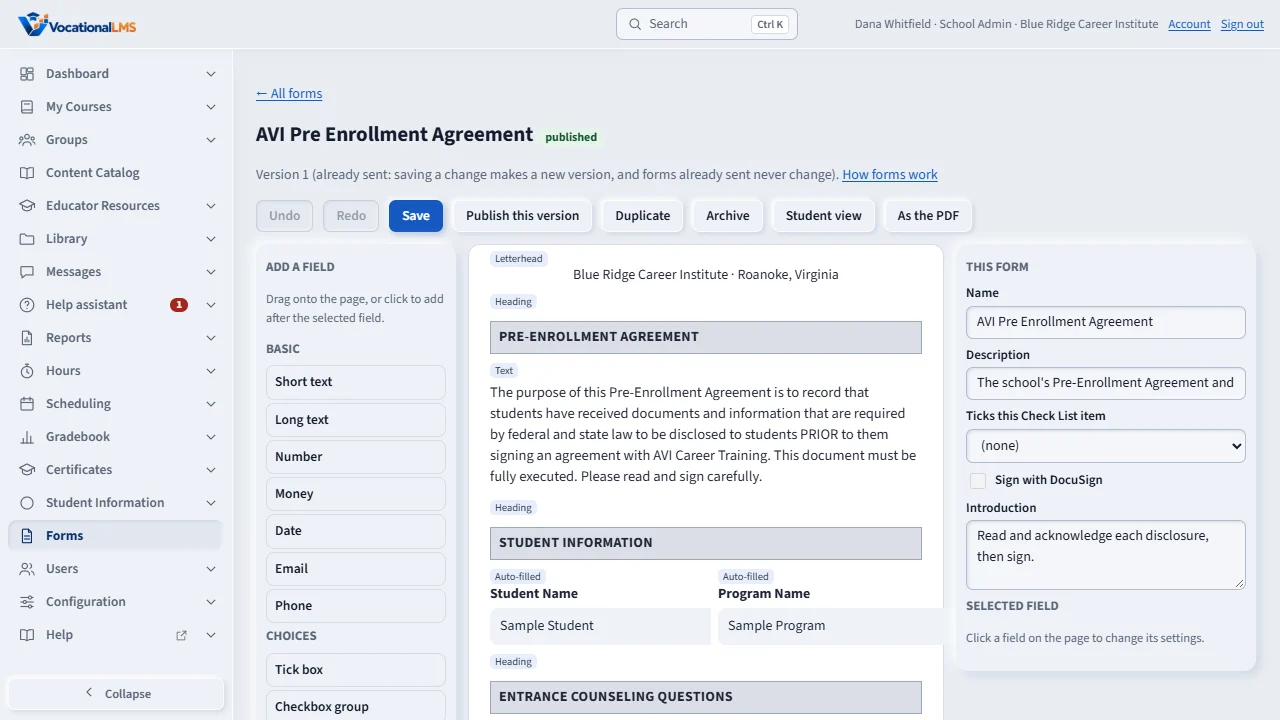
In the builder, the field types are on the left, the page is in the middle and the settings of the selected field are on the right. Drag a field onto the page, or click it to add it.
Drag a field by its handle to move it. Drag its right edge to make it half or a third of the line. Show only if hides a field until another answer is chosen.
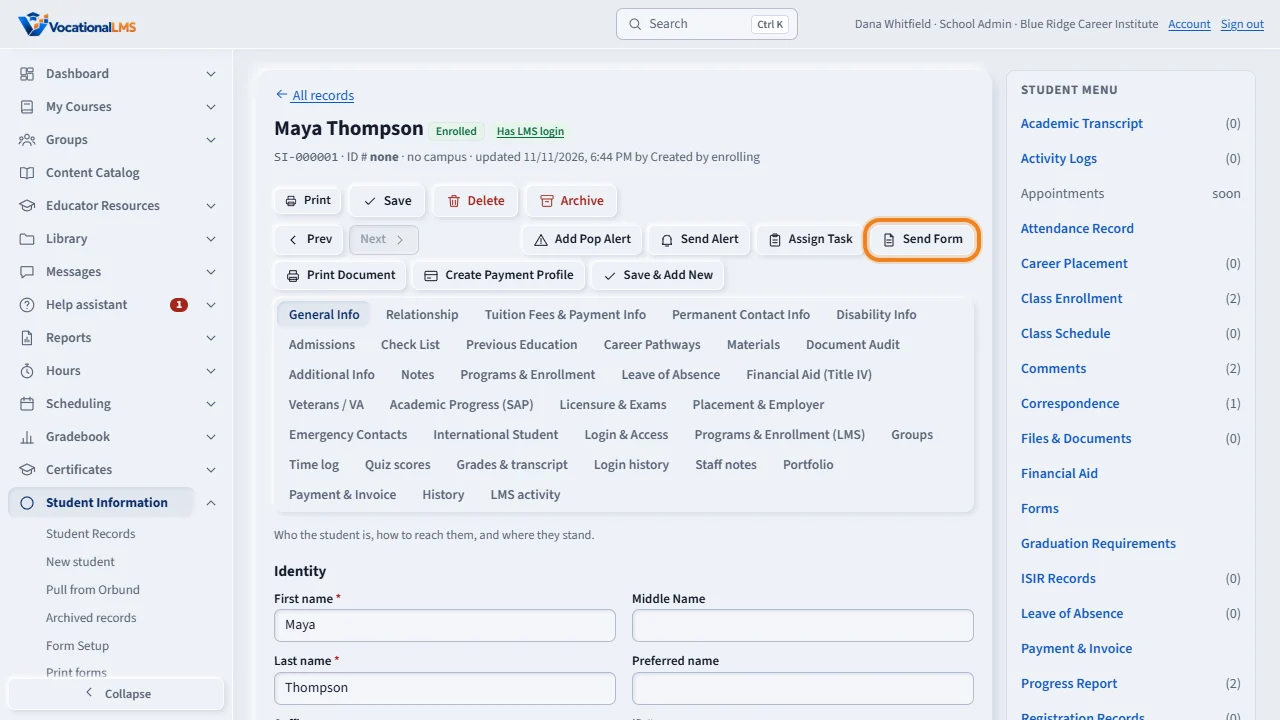
Save the form and press Publish. Then open a student's record and choose Send Form. The student gets an e-mail with a link.
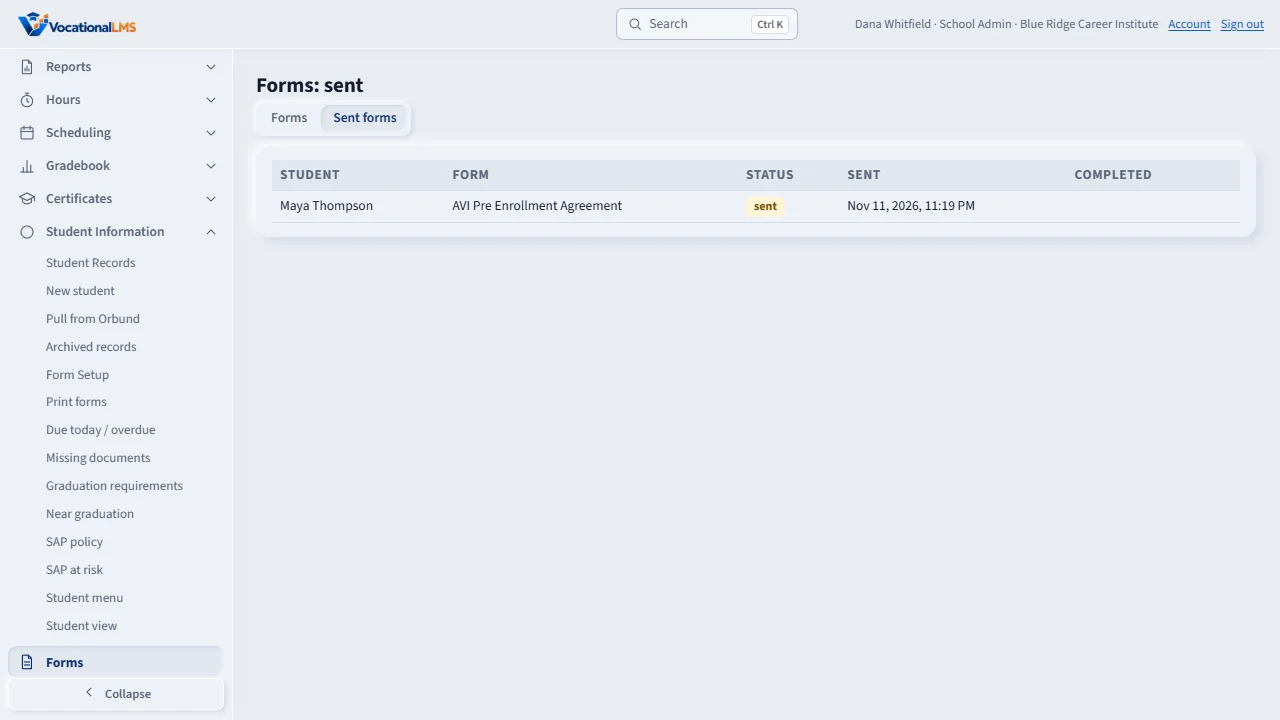
Follow it on the Sent forms list: sent, opened, signed or declined. When it is signed, the signed PDF and its audit trail are kept for you.
Open this in VocationalLMSForms
Who can do this: The School Admin builds, sends, resends, reminds, voids, fills in on behalf and countersigns for the school. A Director and an auditor can read and print signed copies. Instructors do not see Forms. A student sees only their own forms. The VocationalLMS Super Admin can build forms for a school (V-59) but never sends or signs for a student.
What it is for
Open Forms in the Studio menu. A form is built once as a template and reused for every student. The school's real forms are one click away under Add starter forms: Request For Admission, AVI Student Contract Schedule, COS KITS and Books, Orientation Agreement 2026, Credit Balance Authorization Form, FERPA Form, AVI Pre Enrollment Agreement and Enrollment Agreement (plus two generic samples). The wording is the school's own, copied as written. Have an attorney review the Enrollment Agreement (refund, cancellation, payment and Truth-in-Lending style terms) before you send it. Signing is an electronic signature with an audit trail.
Steps
Build a form with the builder
- Open Forms, then New form (or Edit on a starter). The palette on the left lists the field types; the page is in the middle; the settings of the selected field are on the right.
- Drag a field type onto the page, or click it to add it after the selected field. Drag a field by its handle to move it. Drag its right edge, or use the Width list, to make it full width, two thirds, half, a third or a quarter: fields that add up to a full row sit side by side. Without a mouse use the arrow buttons, or Alt with the arrow keys (Up and Down move, Left and Right change the width).
- Field types: short text, long text, number, money, date, signing date (today, editable), email, phone, tick box, checkbox group, radio group, dropdown, signature, initials, file upload, repeating table (for example emergency contacts), text or legal paragraph (bold, italic, lists, tables), section heading, page break, the school's letterhead and logo, a value filled in from the student record, and an office-use value.
- Show only if hides a field until another field has the answer you choose (for example show the license number only when the answer is Yes). A hidden field is not asked, not required and not stored.
- A Social Security number or other ID number must be a Sensitive field typed by the student: it is stored encrypted, shown masked (last four characters) and never filled in automatically. Dates of birth are typed by the student too.
- Undo and Redo cover every change. Student view shows the form as a student sees it (it works on a 390 pixel phone screen); As the PDF shows how the signed PDF will draw it. Delete asks first.
- Choose the Check List item to tick when the form is completed, then Save and Publish. Once a form has been sent it is frozen: editing it makes a new version, and forms already sent never change. School logo on the Forms list sets the logo the letterhead block prints.
Send it
- Open the student's record, then Student menu › Forms (or the Send Form button), choose the form and click Send. If the form has office-use fields (for example the contract and payment plan of the Enrollment Agreement), the dialog asks for them: leave one empty to use the student record's value or leave a blank line. The student gets an email with a link; if email is not set up you are shown the link.
- For a group, open the form in Forms, scroll to Send to a group, choose a program, campus or status, click Count students, then Send. Students who already have it waiting are skipped.
Follow, countersign and keep
- The Forms list on the record shows sent, viewed, waiting for the school, completed, expired, declined or voided. Resend gives a new link and expiry date, Remind emails a reminder with a new link, Void cancels it.
- A form with a school signature (the Enrollment Agreement, Request For Admission, FERPA and others) shows waiting for the school after the student finishes. Click Countersign for the school, type your name and draw your signature: the form is then complete and the signed PDF is made. The Super Admin and a Director cannot countersign.
- Links work for 14 days. Reminders go out on day 3 and day 7, then stop. Fill on behalf records answers given by phone or on paper; it is marked entered by staff, never as the student's signature.
- View shows the answers (sensitive ones masked) and the audit trail. PDF opens the signed copy: letterhead and logo, the form laid out as built, the signature pictures and an audit-trail page. Its SHA-256 is stored; anyone with the code on the last page can check it at /forms/verify. Signed forms are kept forever.
What happens next
A completed form ticks its Check List item and the student can download their own signed copy from My dashboard.
Common problems
| # | Problem | What to do |
|---|---|---|
| 1 | A student says the link does not work. | It may have expired, been used, or been replaced by a Resend or Remind. Use Resend to give a new link. |
| 2 | The builder will not save a field. | A field whose label asks for protected information (a Social Security number) must be marked Sensitive. A show-only-if rule must point at another field of the same form. |
| 3 | The form says waiting for the school. | The student has finished. A School Admin clicks Countersign for the school on the student's Forms list. |
| 4 | The email did not go. | Email may not be set up for the school. The link is shown after you send so you can give it to the student. |