
A-120For School Admins and Directors
Scheduling: locations, instructor availability, time off, the team grid and the calendar
Add the places your instructors work, see every instructor's weekly availability in one grid, approve or decline their changes and time off, and open a calendar of the whole team.
How-to video A-120 · 1:22
Read the words of this video
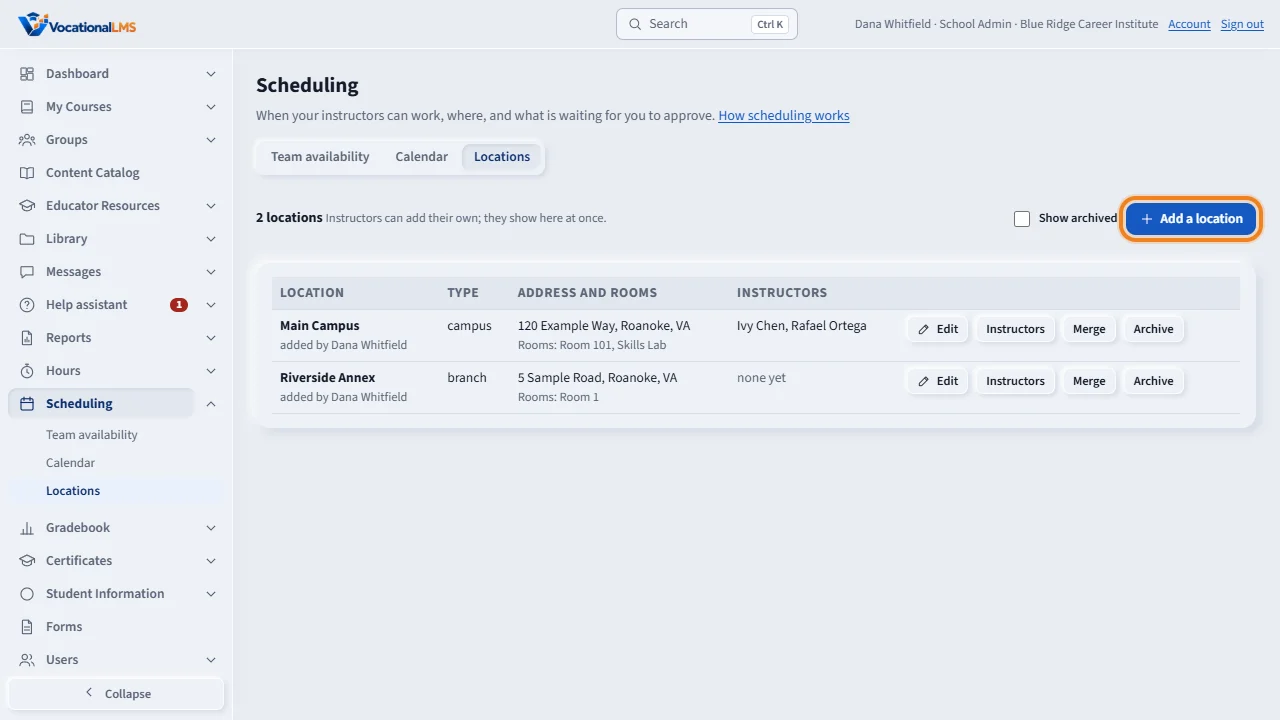
Scheduling is in the menu under Hours. Start with Locations: the campuses, branches and online rooms where your instructors work. Click Add a location, type the name, the address and the rooms. Instructors can add their own, and a location they add shows at once, with no approval. You can edit, merge duplicates, archive, and choose which instructors work where.
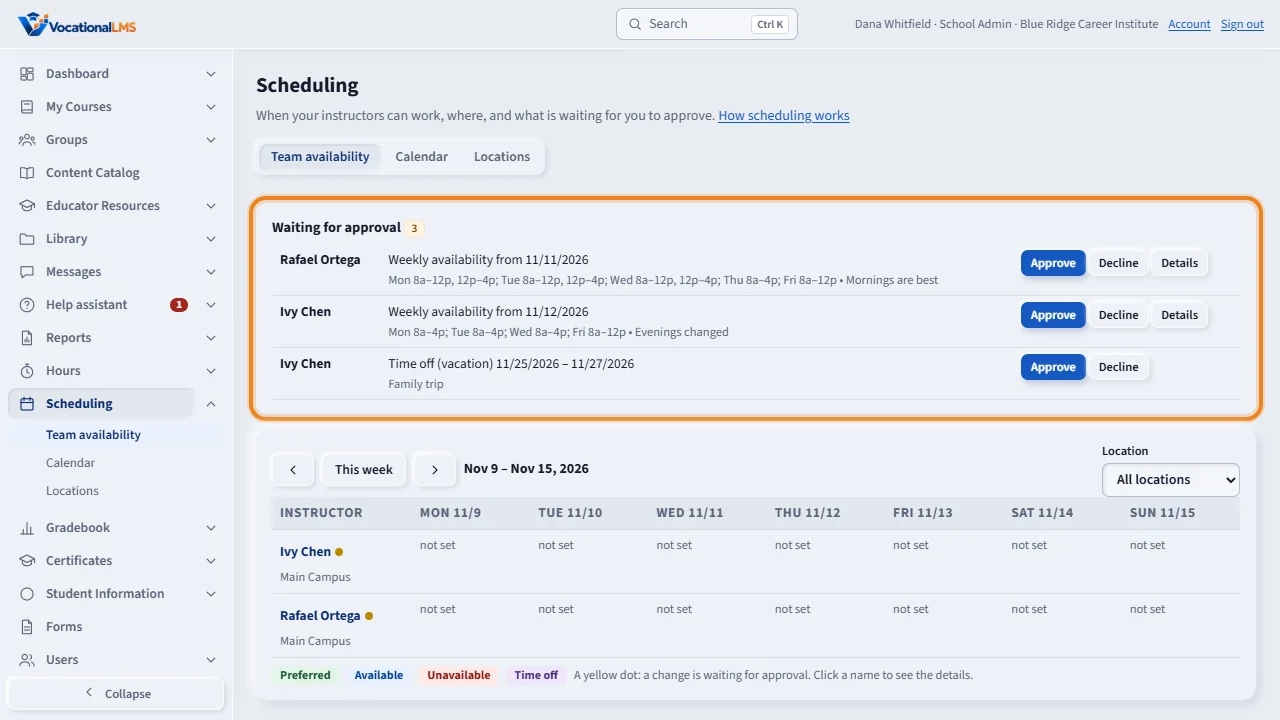
Team availability starts with what is waiting for your approval: availability changes, date changes and time off that instructors sent. Approve, or decline with a short reason. The instructor is told by email and by a notice either way.
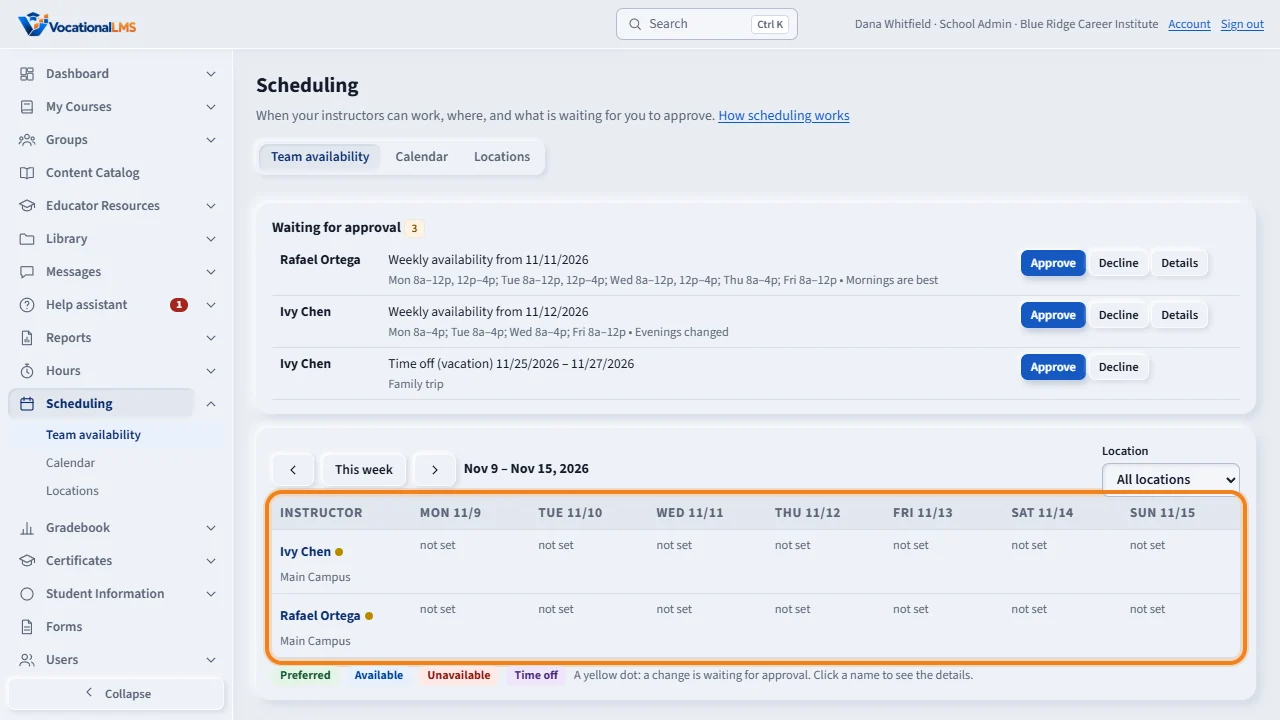
Below is the week at a glance: each instructor by weekday. Green is preferred, blue is available, red is unavailable and purple is time off. Use the arrows to change the week, and the Location filter to see one place. Click a name for that instructor's grid, time off and change history.
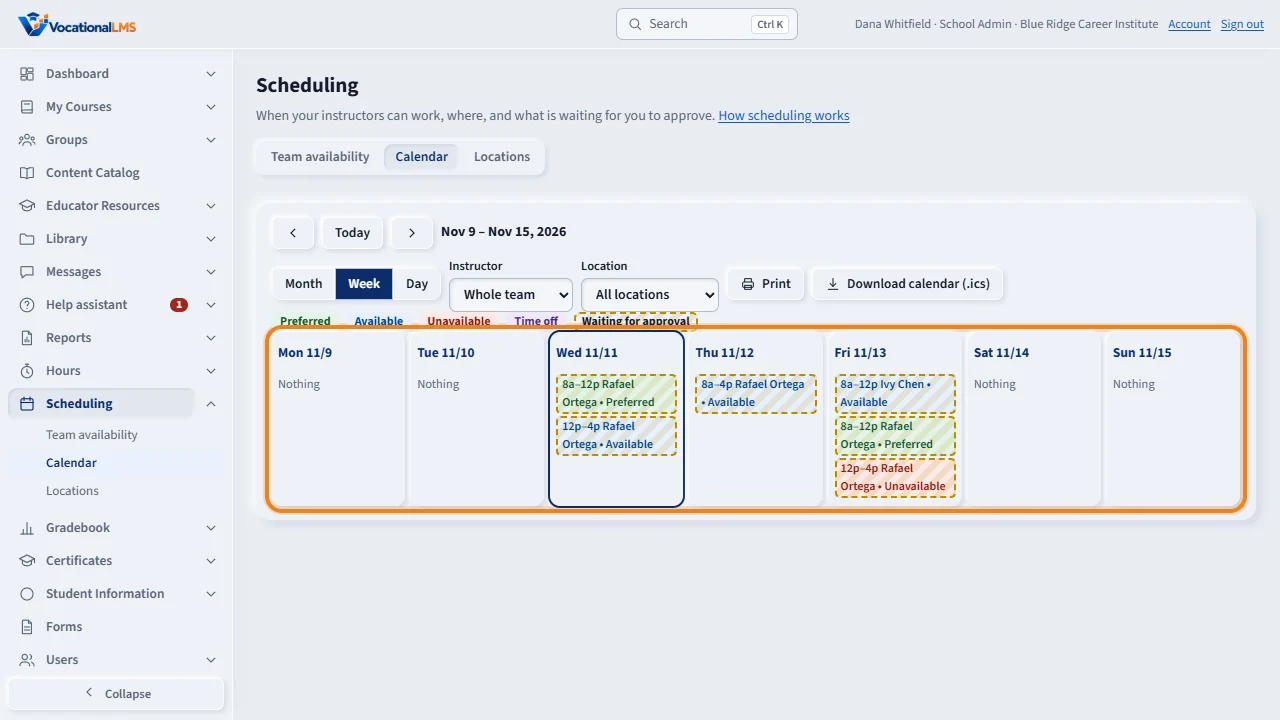
The Calendar shows the whole team by month, week or day. Filter by instructor or location, click an item for its details, print the page, or choose an instructor and download the calendar as an I C S file for Google Calendar, Outlook or Apple Calendar.
Open this in VocationalLMSScheduling > Team availability
Who can do this: The School Admin sees and changes everything and may enter availability, a date change or time off for an instructor (those are approved at once and marked as entered by you). A Director can look at everything and cannot change anything. An instructor sees only his or her own. The VocationalLMS Super Admin chooses a school first. Today only instructors are scheduled; other staff roles can be added later.
What it is for
Scheduling in the menu is where your school plans when instructors can work. Locations lists the campuses, branches and online rooms with their address and rooms; instructors can add their own and it shows at once (no approval). Each instructor sets a weekly availability (a day-by-hour grid: Preferred, Available, Unavailable) with an effective date, and presses Notify manager; you get an email and a notice and approve or decline. Date changes (one day that differs) and time off (vacation, sick, personal, other) are approved the same way. Team availability shows all instructors by weekday for any week, and the Calendar shows the team by month, week or day. Availability, date changes and time off need your approval; locations do not. Every change is kept in a change history that cannot be edited.
Steps
Add locations
- Open Scheduling › Locations and click Add a location. Type the name, choose campus, branch, remote or other, and add the address and the rooms (separated by commas).
- Instructors on a row chooses who works there. Edit changes a location. Merge moves a duplicate's instructors into the location you keep and archives the duplicate. Archive hides a location without deleting anything; Show archived brings it back to the list and Restore makes it active again.
Approve what instructors ask for
- Open Scheduling › Team availability. The box at the top, Waiting for approval, lists every availability change, date change and time off request with Approve and Decline. Declining asks for a short reason; the instructor is told by email and notice either way.
- Details (or the instructor's name) opens that instructor's grid, date changes, time off and change history. A change waiting for approval is shown as the grid with a yellow note above it.
Read the week
- The grid shows each instructor by weekday for the week; This week, the arrows and the Location filter change what you see. Green is preferred, blue is available, red is unavailable, purple is time off; a yellow dot beside a name means a change is waiting.
- To enter availability for an instructor yourself, open the instructor's details, paint the grid and click Save for this instructor.
Use the calendar
- Open Scheduling › Calendar. Choose Month, Week or Day; Today and the arrows move around. Filter by Instructor and by Location. Click any item for its details.
- Print prints the calendar as shown. To give an instructor's calendar to Google Calendar, Outlook or Apple Calendar, choose the instructor and click Download calendar (.ics). On a phone the calendar opens by day.
What happens next
Class sessions, open shifts, the time clock and the hours reports come in later phases; they will appear on this same calendar and in the same menu.
Common problems
| # | Problem | What to do |
|---|---|---|
| 1 | An instructor does not appear in the grid. | Only active instructors of your school are listed. Add the person under Users with the role Instructor, and check that the person is not archived. |
| 2 | I did not get the email. | The notice in your Studio always arrives; the email needs your school's email set up (Configuration). The request is still waiting in Team availability. |
| 3 | A Director cannot approve. | A Director can look at everything but cannot change it; ask the School Admin. |
| 4 | I cannot choose a school. | Only the Super Admin chooses a school, at the top of the page. |